Change Data Capture with PostgreSQL, Debezium and Axual
Most companies rely heavily on the data stored in their databases. If data isn’t stored in the correct database then business processes can be corrupted and you might make decisions based on outdated or incorrect information. This makes the data and changes made to it an interesting source of events. But getting data from a database into a streaming platform has its challenges. This is part 2 of our blog series and continues to explain how to implement Change Data Capture with PostgreSQL, Debezium on the Axual platform.

On this page
What is Change Data Capture?
Change Data Capture is a pattern where a process identifies and captures changes made to data. It then sends the captured changes to another process or system which can process the changes.
CDC solutions use the internal change tracing features of databases allowing them to capture and produce record deletion events as well as record insertions and updates. A lot of databases also allow transactions and changes to the tables definitions to be captured.
Change Data Capture with PostgreSQL
PostgreSQL, or Postgres, is an open source relational database management system and one of the most popular databases to use whose popularity comes from the fact that it can be easily set up as a single machine, but can also be set up for massive scales and for concurrent access by multiple users.
PostgreSQL can be found in big and small companies because of the features, performance and the fact that most cloud providers have a PostgreSQL Database as a Service (DBaaS) offering.
But getting data from PostgreSQL and loading it into Axual Platform, or another Kafka based streaming platform, can be challenging.
Change Data Capture is an approach often considered to be too complex, but has some distinct advantages when compared to other solutions.
Assessing the possible solutions
There are several solution available to architects and developers to get data from a database into a streaming platform, each with its own advantages and disadvantages.
Solution 1 – Change Data Capture
Change Data Capture is a pattern where a process identifies and captures changes made to data. It then sends the captured changes to another process or system which can process the changes.
CDC solutions use the internal change tracing features of databases allowing them to capture and produce record deletion events as well as record insertions and updates. A lot of databases also allow transactions and changes to the tables definitions to be captured.
Debezium is a CDC tool for Kafka based systems that can connect and process changes from a relatively wide range of databases and is packaged as a Kafka Connect source connector.
An advantage of using CDC is that it can capture inserts, updates and deletes of records, as well as tracking transactions and sometimes datamodel changes.
A disadvantage is that CDC tools often support only a limited number of database vendors, as specific internal knowledge is required to connect and use the internal change tracking features of a database.
Solution 2 – Kafka Connect with JDBC Source Connectors
Kafka Connect is of course one of the default solutions to investigate to get data from an external system to Kafka and back.
JDBC, or Java Database Connectivity, is an API that allows applications to access a database in a generic way, without requiring knowledge of the native protocols used by the database.
Database vendors often provide JDBC Drivers, which translate the JDBC API calls to the database specific format to handle connections and queries.
There are JDBC Source connectors available for Kafka Connect that can read from tables and that regularly perform SQL queries to determine if there are changes. These changes are then produced to the topics by Kafka Connect.
A major advantage of these connectors is the fact that they are generic. The solution works on most databases, because most database vendors supply JDBC Drivers.
A disadvantage is that the change capture capabilities are limited by the use of SQL statements. Tables need a special column to determine for each record if and when it was changed, and that you cannot catch a deletion of a record in a table without additional logic in the database, such as triggers.
Solution 3 – Developing a custom application
A custom application can be developed that connects to the database, scans the schemas, tables and data inside the tables, and writes the results to one or more Kafka topics.
The greatest advantage of this solution is that since this application is custom made it can be optimised for a specific database and use any database specific feature.
A disadvantage of developing a custom application is that is can become very complex and hard to maintain as it is also very hard to design and implement an application like this to be reusable and scalable.
Another disadvantage of this approach is that it almost impossible to determine if a record was deleted from a table, unless the database offers special features for that.
Example use case with Change Data Capture
Most organisations have a process for reporting and processing incident reports and in our use case the incident reports are created and updated by an application that stores the data in a PostgreSQL database.
Change Data Capture will be used to capture the creation, updates and deletion of reports in the database and publish them on the Axual Platform to allow other systems to consume and process the events.

The table IncidentReports from the Incidents schema will be read by the Debezium Connector in Kafka Connect, which will load any new, updated or deleted data entries to the appropriate topic in the Kafka Cluster.
The incident report changes should go to the topic cdc-incident-reports.
The transaction metadata events that are captured from the database should be sent to the topic cdc-transactions.

Preparing the PostgreSQL database
The Debezium connector for PostgreSQL can scan schemas for changes in tables by using the PostgreSQL Logical Decoding feature. This feature makes it possible to extract the data changes from the transaction log and process these changes with a plugin.
PostgreSQL versions 10 and later already have a default plugin installed, called pgoutput.
An alternative approach is using the decoderbufs and wal2json plugins.
The database administrator/operator should be involved in the selection and installation of these plugins, as they can have an operational impact.
For this guide the default pgoutput plugin will be used.
Prerequisites
The following resources are needed to prepare the database for the Change Data Capture example:
- A PostgreSQL database, preferably version 10 or newer
- Terminal access to the database server with a user that can read and write to the configuration files of the database and execute the Postgres cli commands,
psqlandpg_ctl reload - Administrator access to the database, or any user that can create schemas, tables, roles and grants
- A SQL Client application, for example
psqlon the machine running the database
Creating the database schema and table
For these steps the SQL client is required. The example code will use the psql client on the database server.
- Open a connection to the PostgreSQL server as an administrator
psql -U <username> -d <database name> -h <hostname> -p <port number>
A prompt should appear to enter the password. - Create the schema INCIDENTS
CREATE SCHEMA INCIDENTS; - Create the IncidentReports table
CREATE TABLE INCIDENTS."IncidentReports" (
"IncidentId" INTEGER PRIMARY KEY GENERATED BY DEFAULT AS IDENTITY,
"Reporter" VARCHAR(100) NOT NULL,
"Description" VARCHAR(255) NOT NULL,
"Report" TEXT NOT NULL,
"Status" VARCHAR(100) NOT NULL DEFAULT 'OPEN' ); - The replication identity needs to be set to make sure that Debezium received both the changed record and the record as it was before the change
ALTER TABLE INCIDENTS."IncidentReports" REPLICA IDENTITY FULL;
Creating the replication user and setting ownership
PostgreSQL has specific requirements of the grants, or permissions, needed by a user to perform replication like Debezium uses.
These grants are:
- Replication to allows the user to be set up replication connections
- Create on database to allow creation of publication resources used to publish change events
- Owner on schema and table to determine the state and any changes to the table and schema
Most of these requirements can be met by granting them to the user, but changing the ownership of a schema or table can disrupt other activities on the database. Groups can be created to prevent that. The group will own those resources, and the new replication user and the original owner will be members of that group. This ensures that there will be no unintended disruptions for other systems.
- Open a connection to the PostgreSQL server as an administrator
psql -U <username> -d <database name> -h <hostname> -p <port number>
A prompt should appear to enter the password. - Create the user cdcUser with password cdcDemo to be used for replication
CREATE ROLE "cdcUser" WITH REPLICATION LOGIN PASSWORD 'cdcDemo'; - Create the new role that will own the INCIDENTS schema and IncidentReport table
CREATE ROLE CDC_REPLICATION_GROUP; - Add the cdcUser to the group
GRANT CDC_REPLICATION_GROUP TO "cdcUser"; - Add the user that owns the schema and table to the group, in this case it’s the username used in step 1
GRANT CDC_REPLICATION_GROUP TO <username>; - Set the new group as owner of the schema to allow the scan for changes
ALTER SCHEMA INCIDENTS OWNER TO CDC_REPLICATION_GROUP; - Set the new group as owner of the table:
ALTER TABLE INCIDENTS."IncidentReports" OWNER TO CDC_REPLICATION_GROUP; - Give the new user create access on the database to create publications:
GRANT CREATE ON DATABASE <database> TO "cdcUser";
Enabling Logical Decoding and allowing connections
Several changes are required to the PostgreSQL configuration files to enable the Logical Decoding feature and to allow replication connections.
- Open a terminal on the machine hosting PostgreSQL
- Go to the directory containing the database files and open the file postgresql.conf in a file editor
- Search for the WAL settings and make sure the following configuration is used
wal_level=logical - Save the postgresql.conf file and exit the file editor
- Restart the PostgreSQL server if you had to add or change an existing setting
Logical Decoding should now be active - Go to the directory containing the database files and open the file pg_hba.conf in a file editor
- Add the following entry to the replication block to allow the user cdcUser to connect for replication from any host
host replication cdcUser all scram-sha-256 - Reload the configuration using the following command, the database directory is usually the directory where the configuration files are stored
pg_ctl -D <path to database directory> reload - Verify that a replication connection can be created using the
cdcUsercredentialspsql "dbname=<database_name> replication=database" -c "IDENTIFY_SYSTEM;" -U cdcUser -h <hostname> -p <port_number>
A prompt to enter the password should appear, usecdcDemo
An output similar to this should be shownsystemid | timeline | xlogpos | dbname
---------------------+----------+-----------+---------
7119453166424051742 | 1 | 0/17424D0 | axualdb
(1 row)
Next steps
After completing the steps in this article the database is prepared for connections from Debezium.
The next article will be focussed on using Debezium for PostgreSQL in the Axual Platform.
About PostgreSQL
PostgreSQL, or Postgres, is an open source relational database management system and one of the most popular databases to use whose popularity comes from the fact that it can be easily set up as a single machine, but can also be set up for massive scales and for concurrent access by multiple users.
PostgreSQL can be found in big and small companies because of the features, performance and the fact that most cloud providers have a PostgreSQL Database as a Service (DBaaS) offering
What is Debezium?
Debezium is a CDC tool for Kafka based systems that can connect and process changes from a relatively wide range of databases and is packaged as a Kafka Connect source connector.
What is Axual?
Axual is an all-in-one event stream processing platform for enterprise organizations. The Axual platform is complementary to Apache Kafka and provides additional functionality for data governance, audit trails, security, multi-tenancy and data synchronization, among others. The Axual self-service interface makes it easy for teams to get up and running with Kafka and are able to start producing and/or consuming events in minutes. It’s our mission to make streaming simple.
Now, let’s dive into the good stuff.
Example use case with Change Data Capture
Most organisations have a process for reporting and processing incident reports and in our use case the incident reports are created and updated by an application that stores the data in a PostgreSQL database.
Change Data Capture will be used to capture the creation, updates and deletion of reports in the database and publish them on the Axual Platform to allow other systems to consume and process the events.

The table IncidentReports from the Incidents schema will be read by the Debezium Connector in Kafka Connect, which will load any new, updated or deleted data entries to the appropriate topic in the Kafka Cluster.
The incident report changes should go to the topic cdc-incident-reports.
The transaction metadata events that are captured from the database should be sent to the topic cdc-transactions.

Prerequisites
The following resources are needed to configure the connector using Axual Self Service
- Credentials to access Axual Self Service for a user with Stream Author and Application Author roles
- A group is available in Axual Self Service which will own the new streams and application
The user must be a member of this group - An environment in Axual Self Service with Connect enabled,
- Debezium for PostgreSQL version 1.9.x is installed in Connect
- An unencrypted private RSA key file in PEM format and a certificate signed by a certificate authority marked as trusted for your Axual deployment
- A SQL Client application, for example
psqlon the machine running the database to modify the IncidentReports table.
You should contact your local support team for Axual platform to get access to Self Service or to get the connector installed in your deployment.
The support team should also be able to help on the correct procedure to get your certificate signed.
If you don’t have these resources you can contact the support team for your Axual Platform deployment to help you
Inserting initial data into the database table
Most database tables will already contain records. This can be considered the initial state when performing Change Data Capture.
Debezium will read and publish these records on Kafka with an indicator that the record comes from existing data, and was not a captured change.
The IncidentReports table needs to be filled with some data as well to demonstrate this behaviour. The example code will use the psql client on the database server to insert the data.
- Open the SQL client and connect to the database
psql -U <username> -d <database name> -h <hostname> -p <port number>
A prompt should appear to enter the password. - Insert two records into the table with the following SQL statement
INSERT INTO INCIDENTS."IncidentReports"( "Reporter", "Description", "Report" )
VALUES ('Richard', 'System NP123 offline', 'Non Production System 123 is offline' ),
('Eric', 'System P001 Unreachable', 'Production System 001 is rejecting all connections' );
- Verify the contents of the table.
SELECT * FROM INCIDENTS."IncidentReports";
It should look similar to this.
 IncidentId | Reporter |       Description       |                      Report                        | Status
------------+----------+-------------------------+----------------------------------------------------+--------
      1     | Richard  | System NP123 offline    | Non Production System 123 is offline               | OPEN
      2     | Eric     | System P001 Unreachable | Production System 001 is rejecting all connections | OPEN
(2 rows)
- Disconnect from the database and close the SQL Client
Determining the required stream names
The streams, or topics, on the Kafka clusters needed by Debezium need to be created using the Axual Self Service portal since the Axual platform does not allow direct topic creations on a cluster by applications.
Debezium determines the target topic of a change event based on the names of the database, schema and table where the change occurred. In the guide we will override this behaviour to direct the event to correct stream by using a Debezium supplied routing transformation for Connect.
This routing transformation is installed as part of the Debezium connector.
Two streams will be created, cdc-incident-reports for the changed records from the IncidentReports table, and cdc-incident-transactions for the database transaction events that were captured by Debezium.
Configuring the Streams using Axual Self Service
- Log into the Self Service portal with your user account
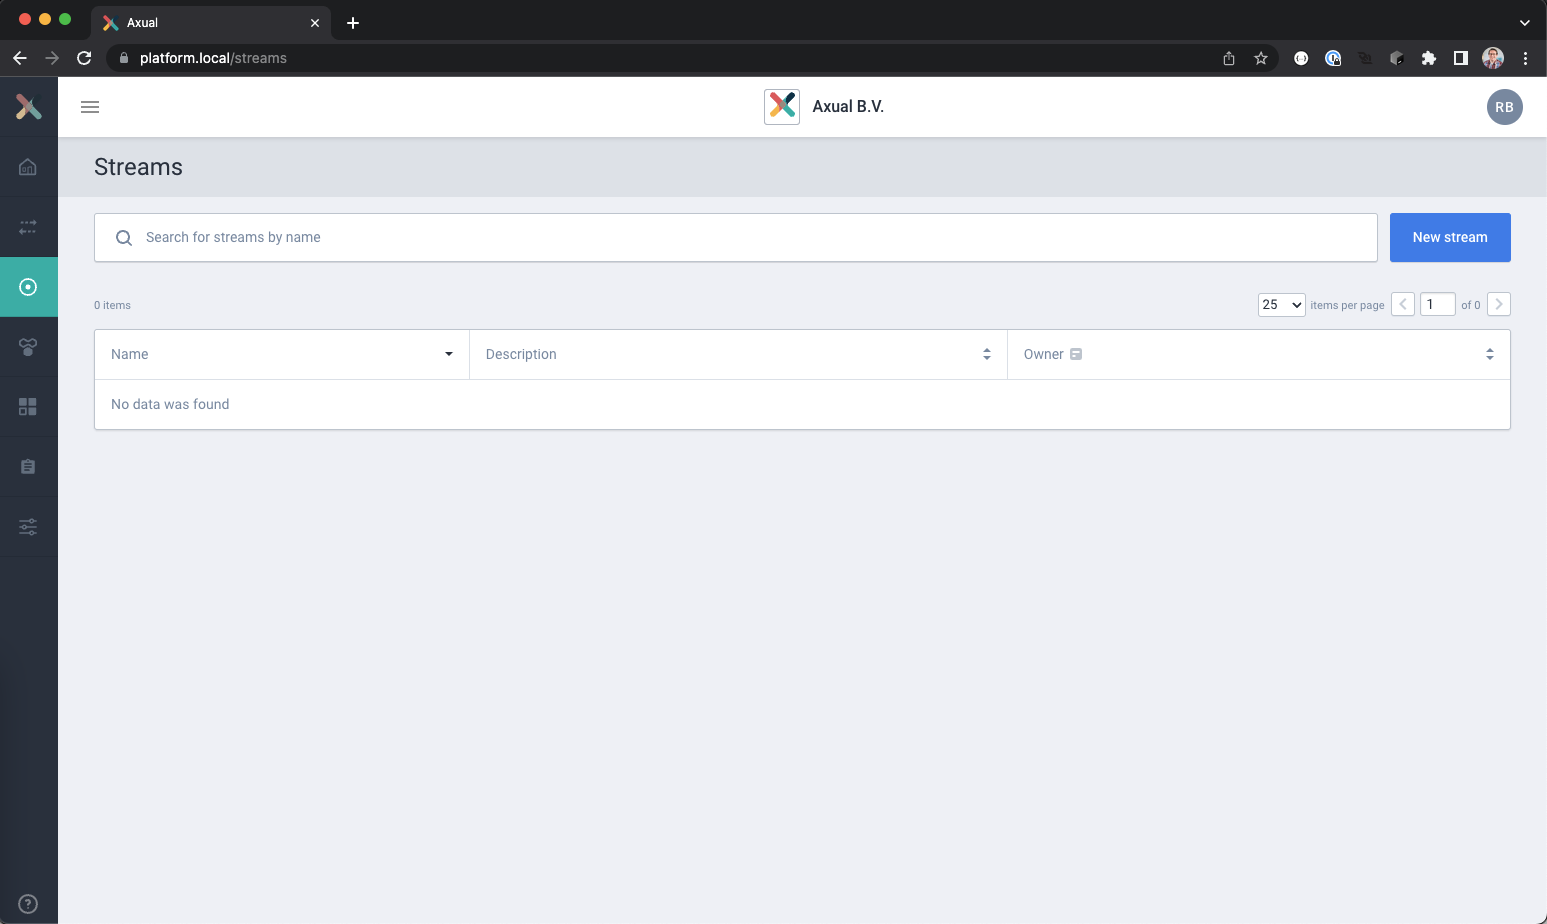
- Go to the Streams page
A list of available streams should be visible now, with a search and a New Stream button
- Create a new stream using the New Stream button
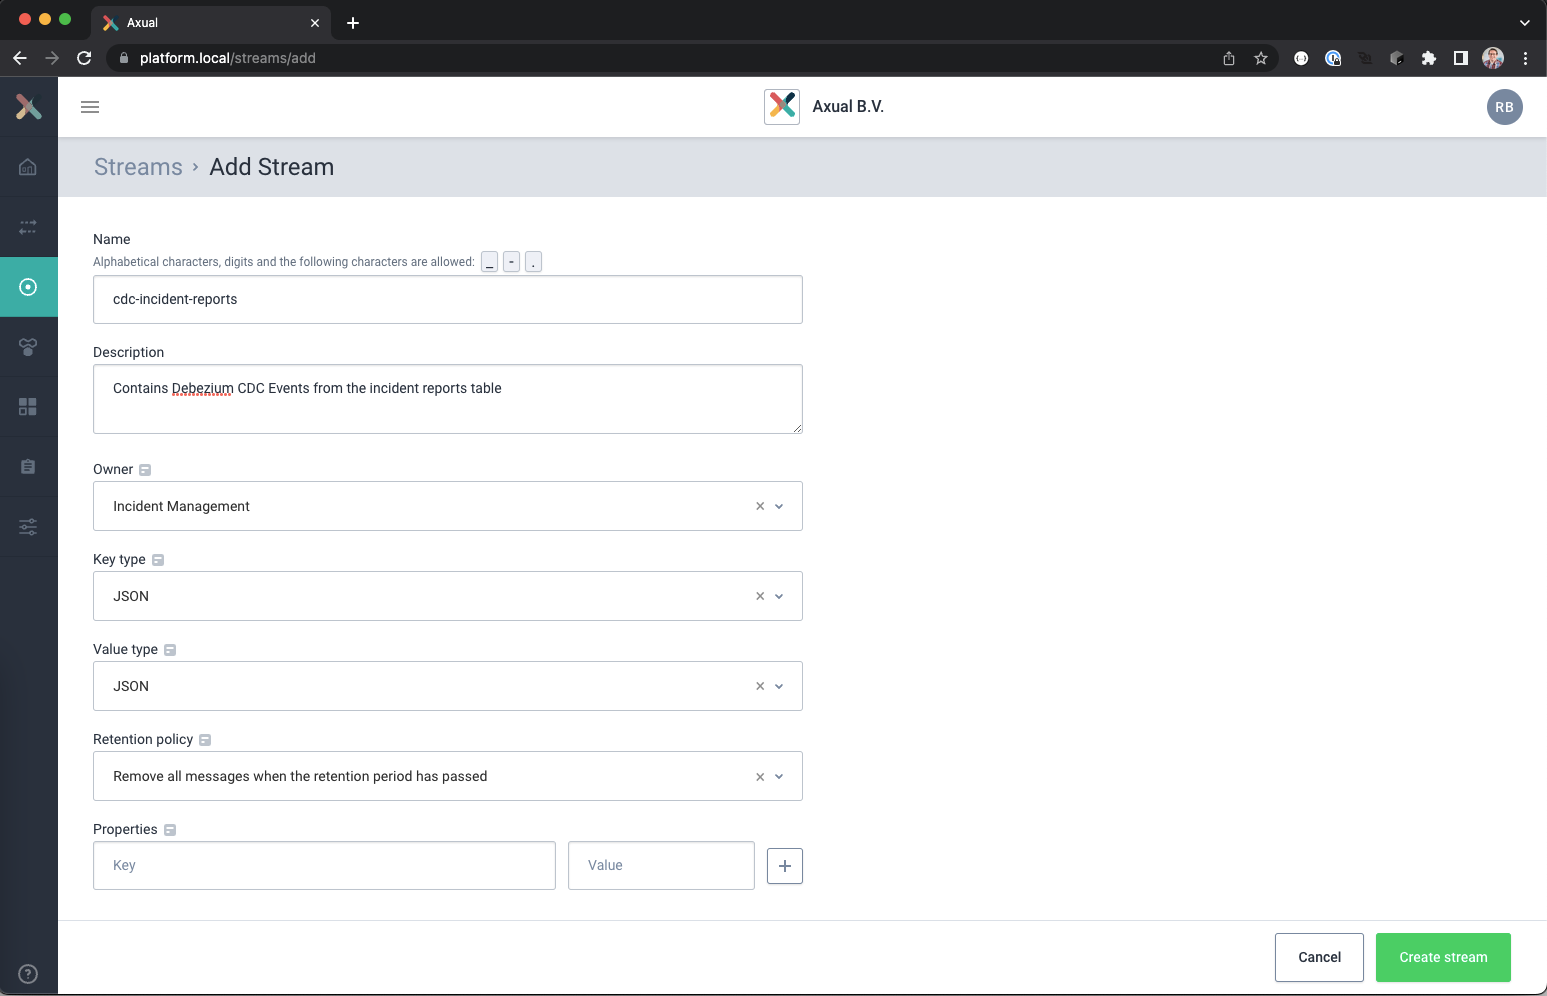
The Add Stream page should load. - Use the following settings for the new stream:
Name: cdc-incident-reports
Description: Contains Debezium CDC Events from the incident reports table
Owner: <Your team> (Incident Management in example)
Key type: JSON
Value type: JSON
Retention Policy: Remove all messages when the retention period has passed
- When done, click the Create Stream button.
The streams detail page should open now for the new stream
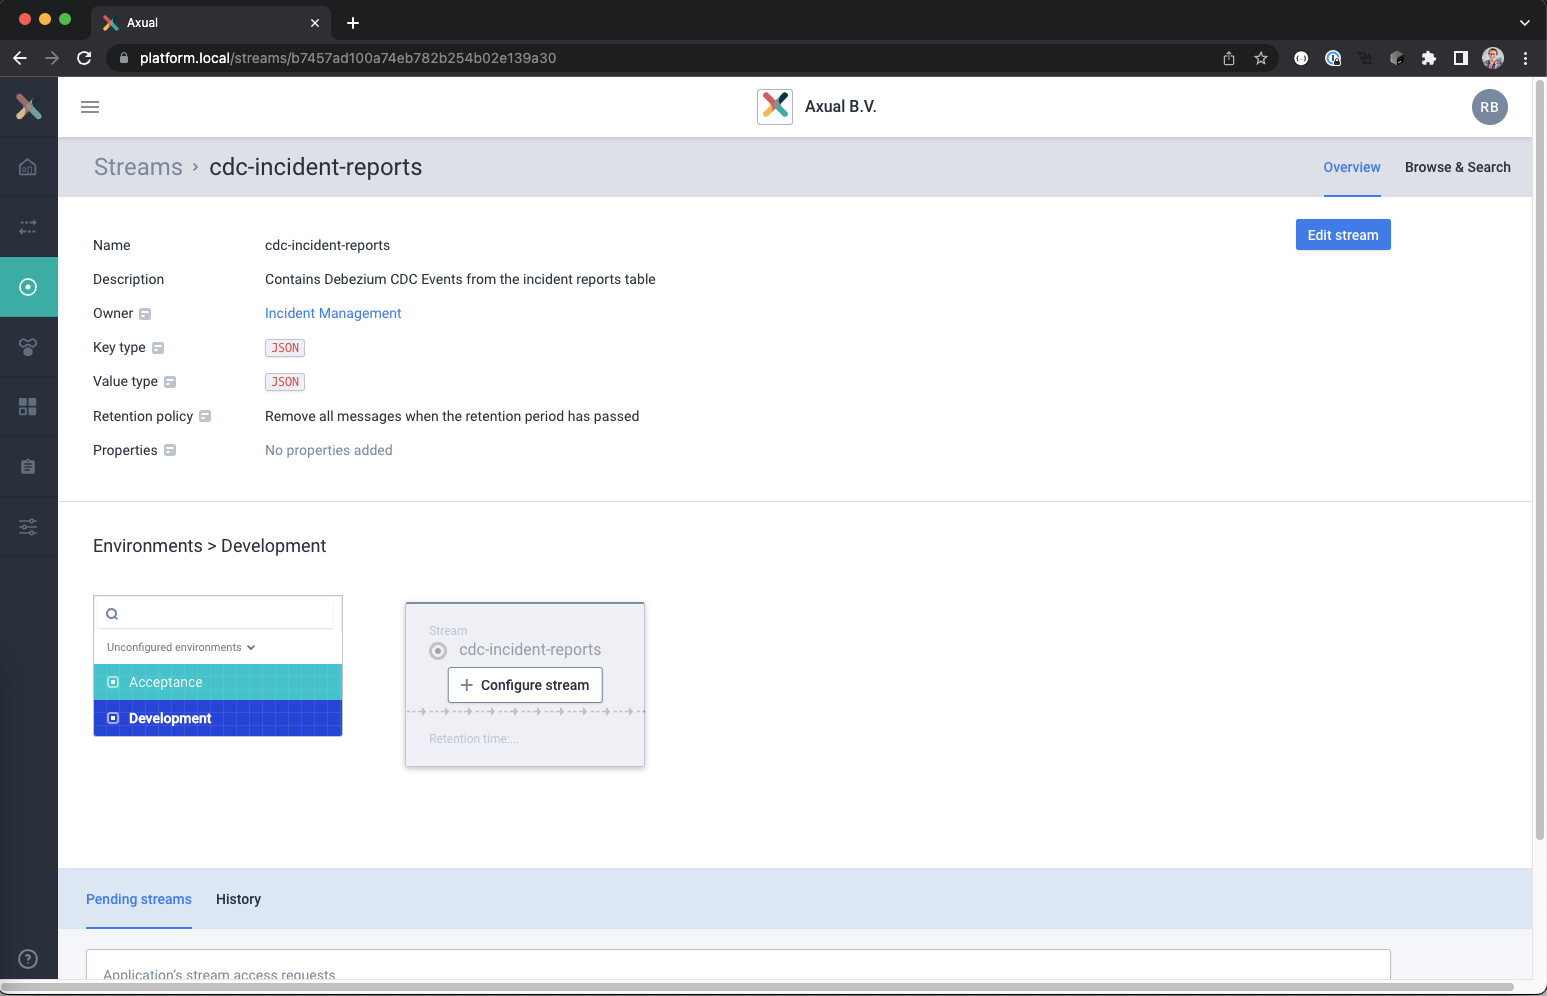
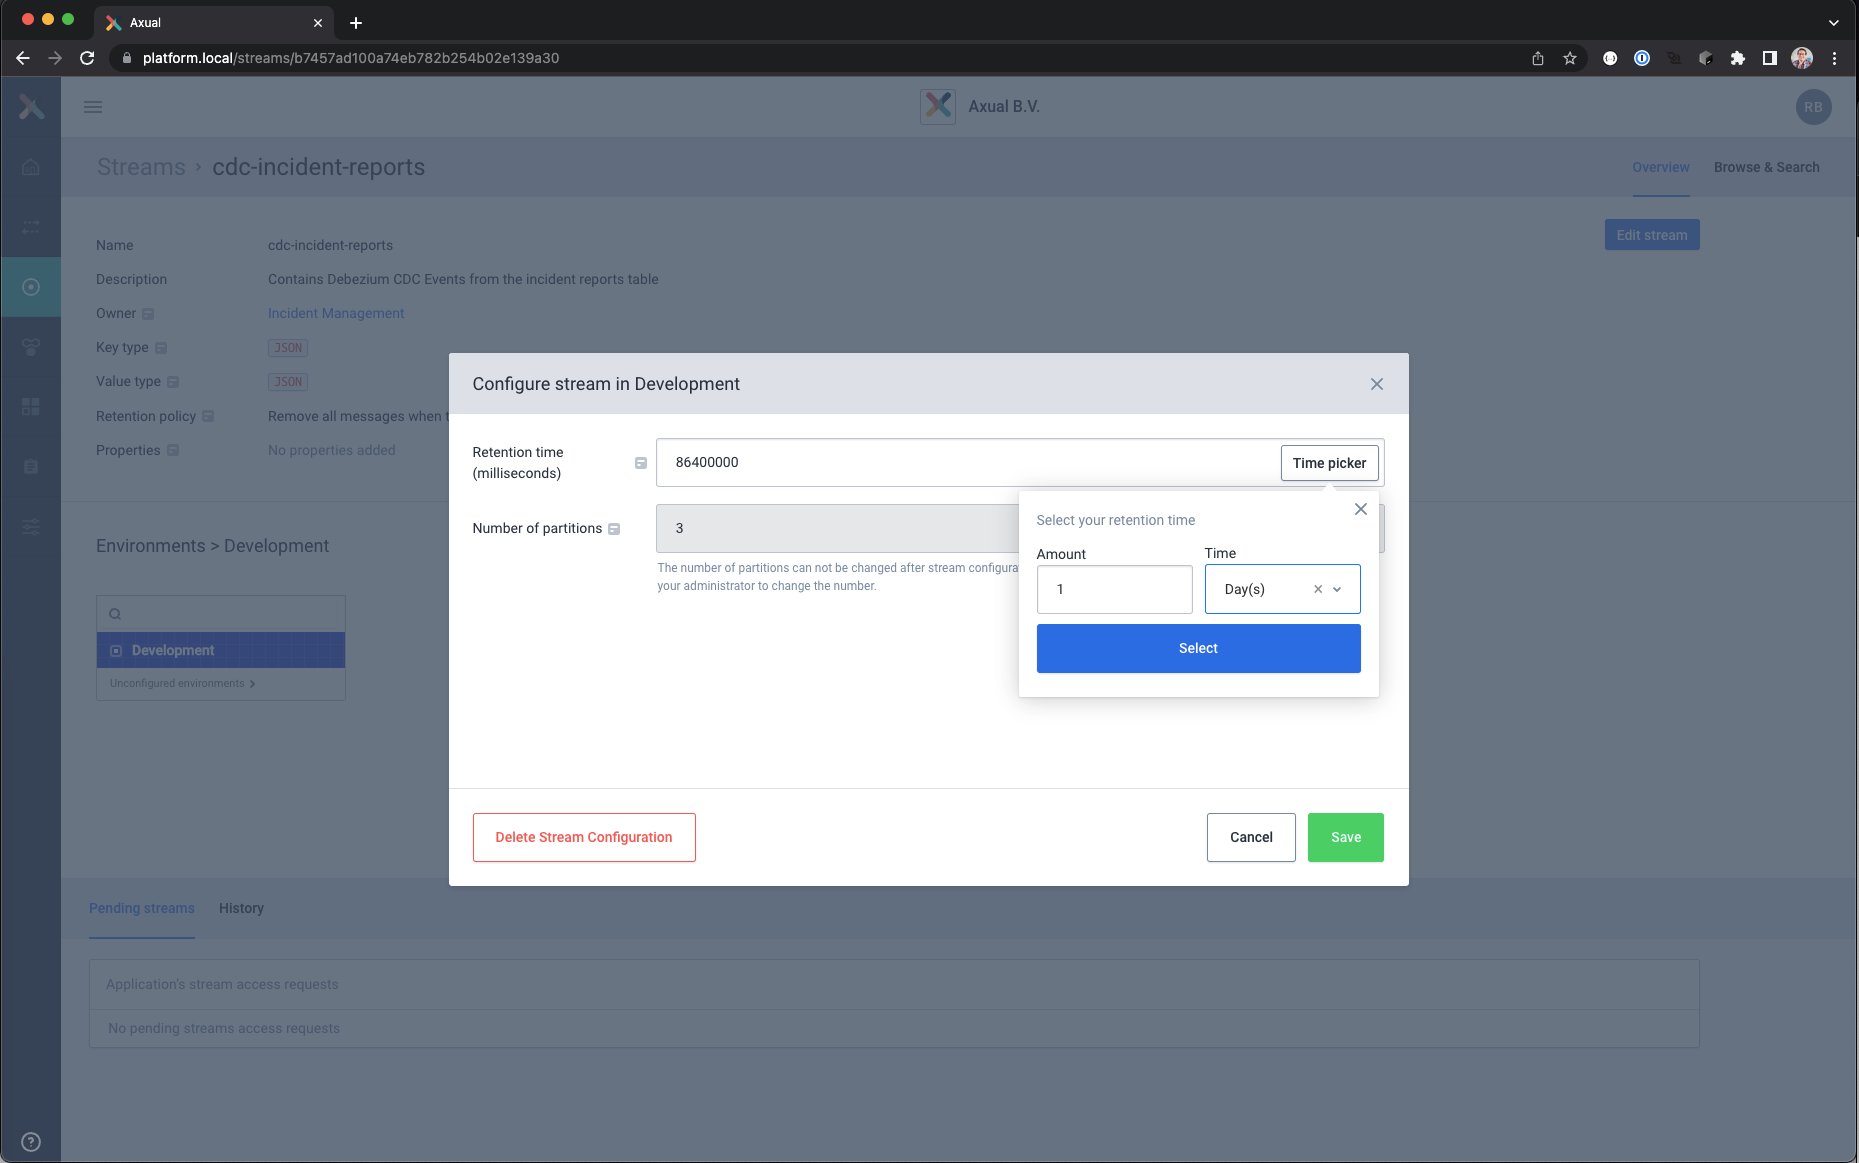
- Select the Development environment and click on Configure Stream and set the following values
Retention time : 1 day (use time picker)
Number of partitions: 3
When done, save the configuration using the Save button
- Repeat the previous steps to create a second stream for the transaction data.
– Use the following configuration settings for the stream
Name: cdc-incident-transactions
Description: Contains Debezium CDC Transaction events
Owner: <Your team> (Incident Management in example)
Key type: JSON
Value type: JSON
Retention Policy: Remove all messages when the retention period has passed
– Use these settings for the configuration on the Development environment
Retention time : 1 day (use time picker)
Number of partitions: 3
The two streams are now configured on you Kafka Cluster, but no application is registered yet to produce or consume data from these streams.
Configuring the Debezium connector using Axual Self Service
- Log into the Self Service portal with your user account
- Open the applications page.
A list of applications should be visible now, with a search and a New Application button.
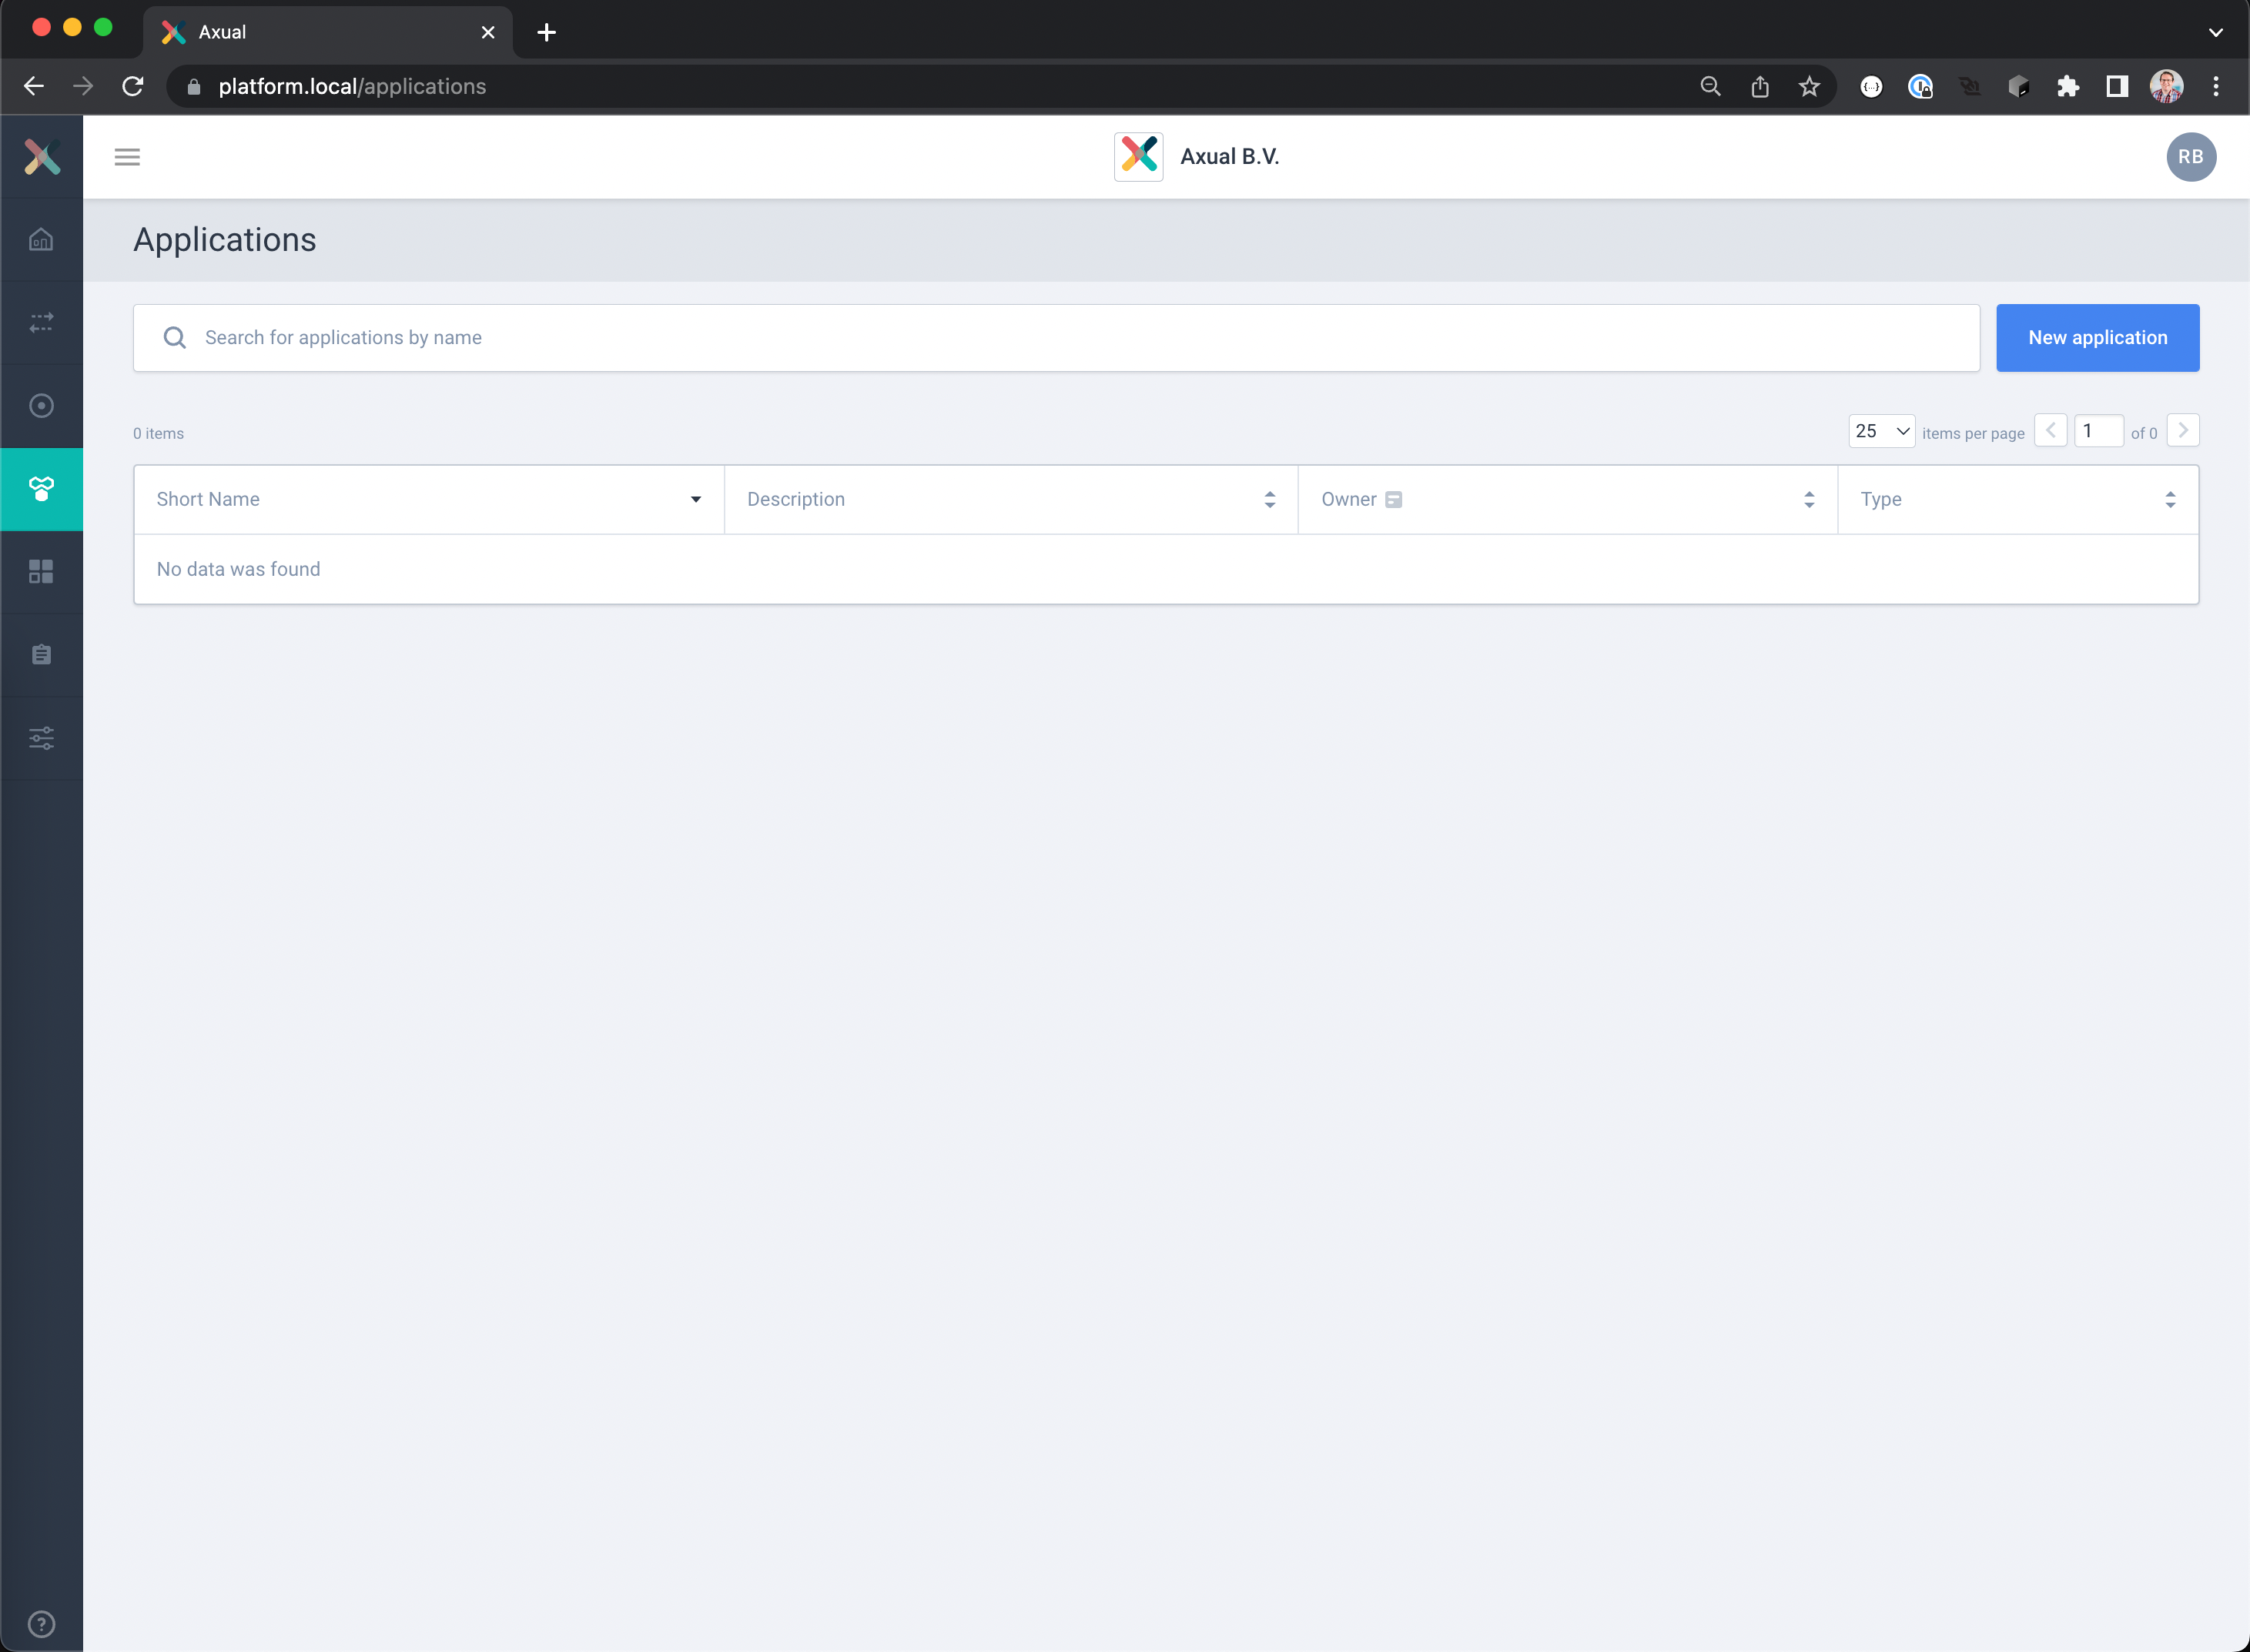
- Create a new application registration using the New Application button.
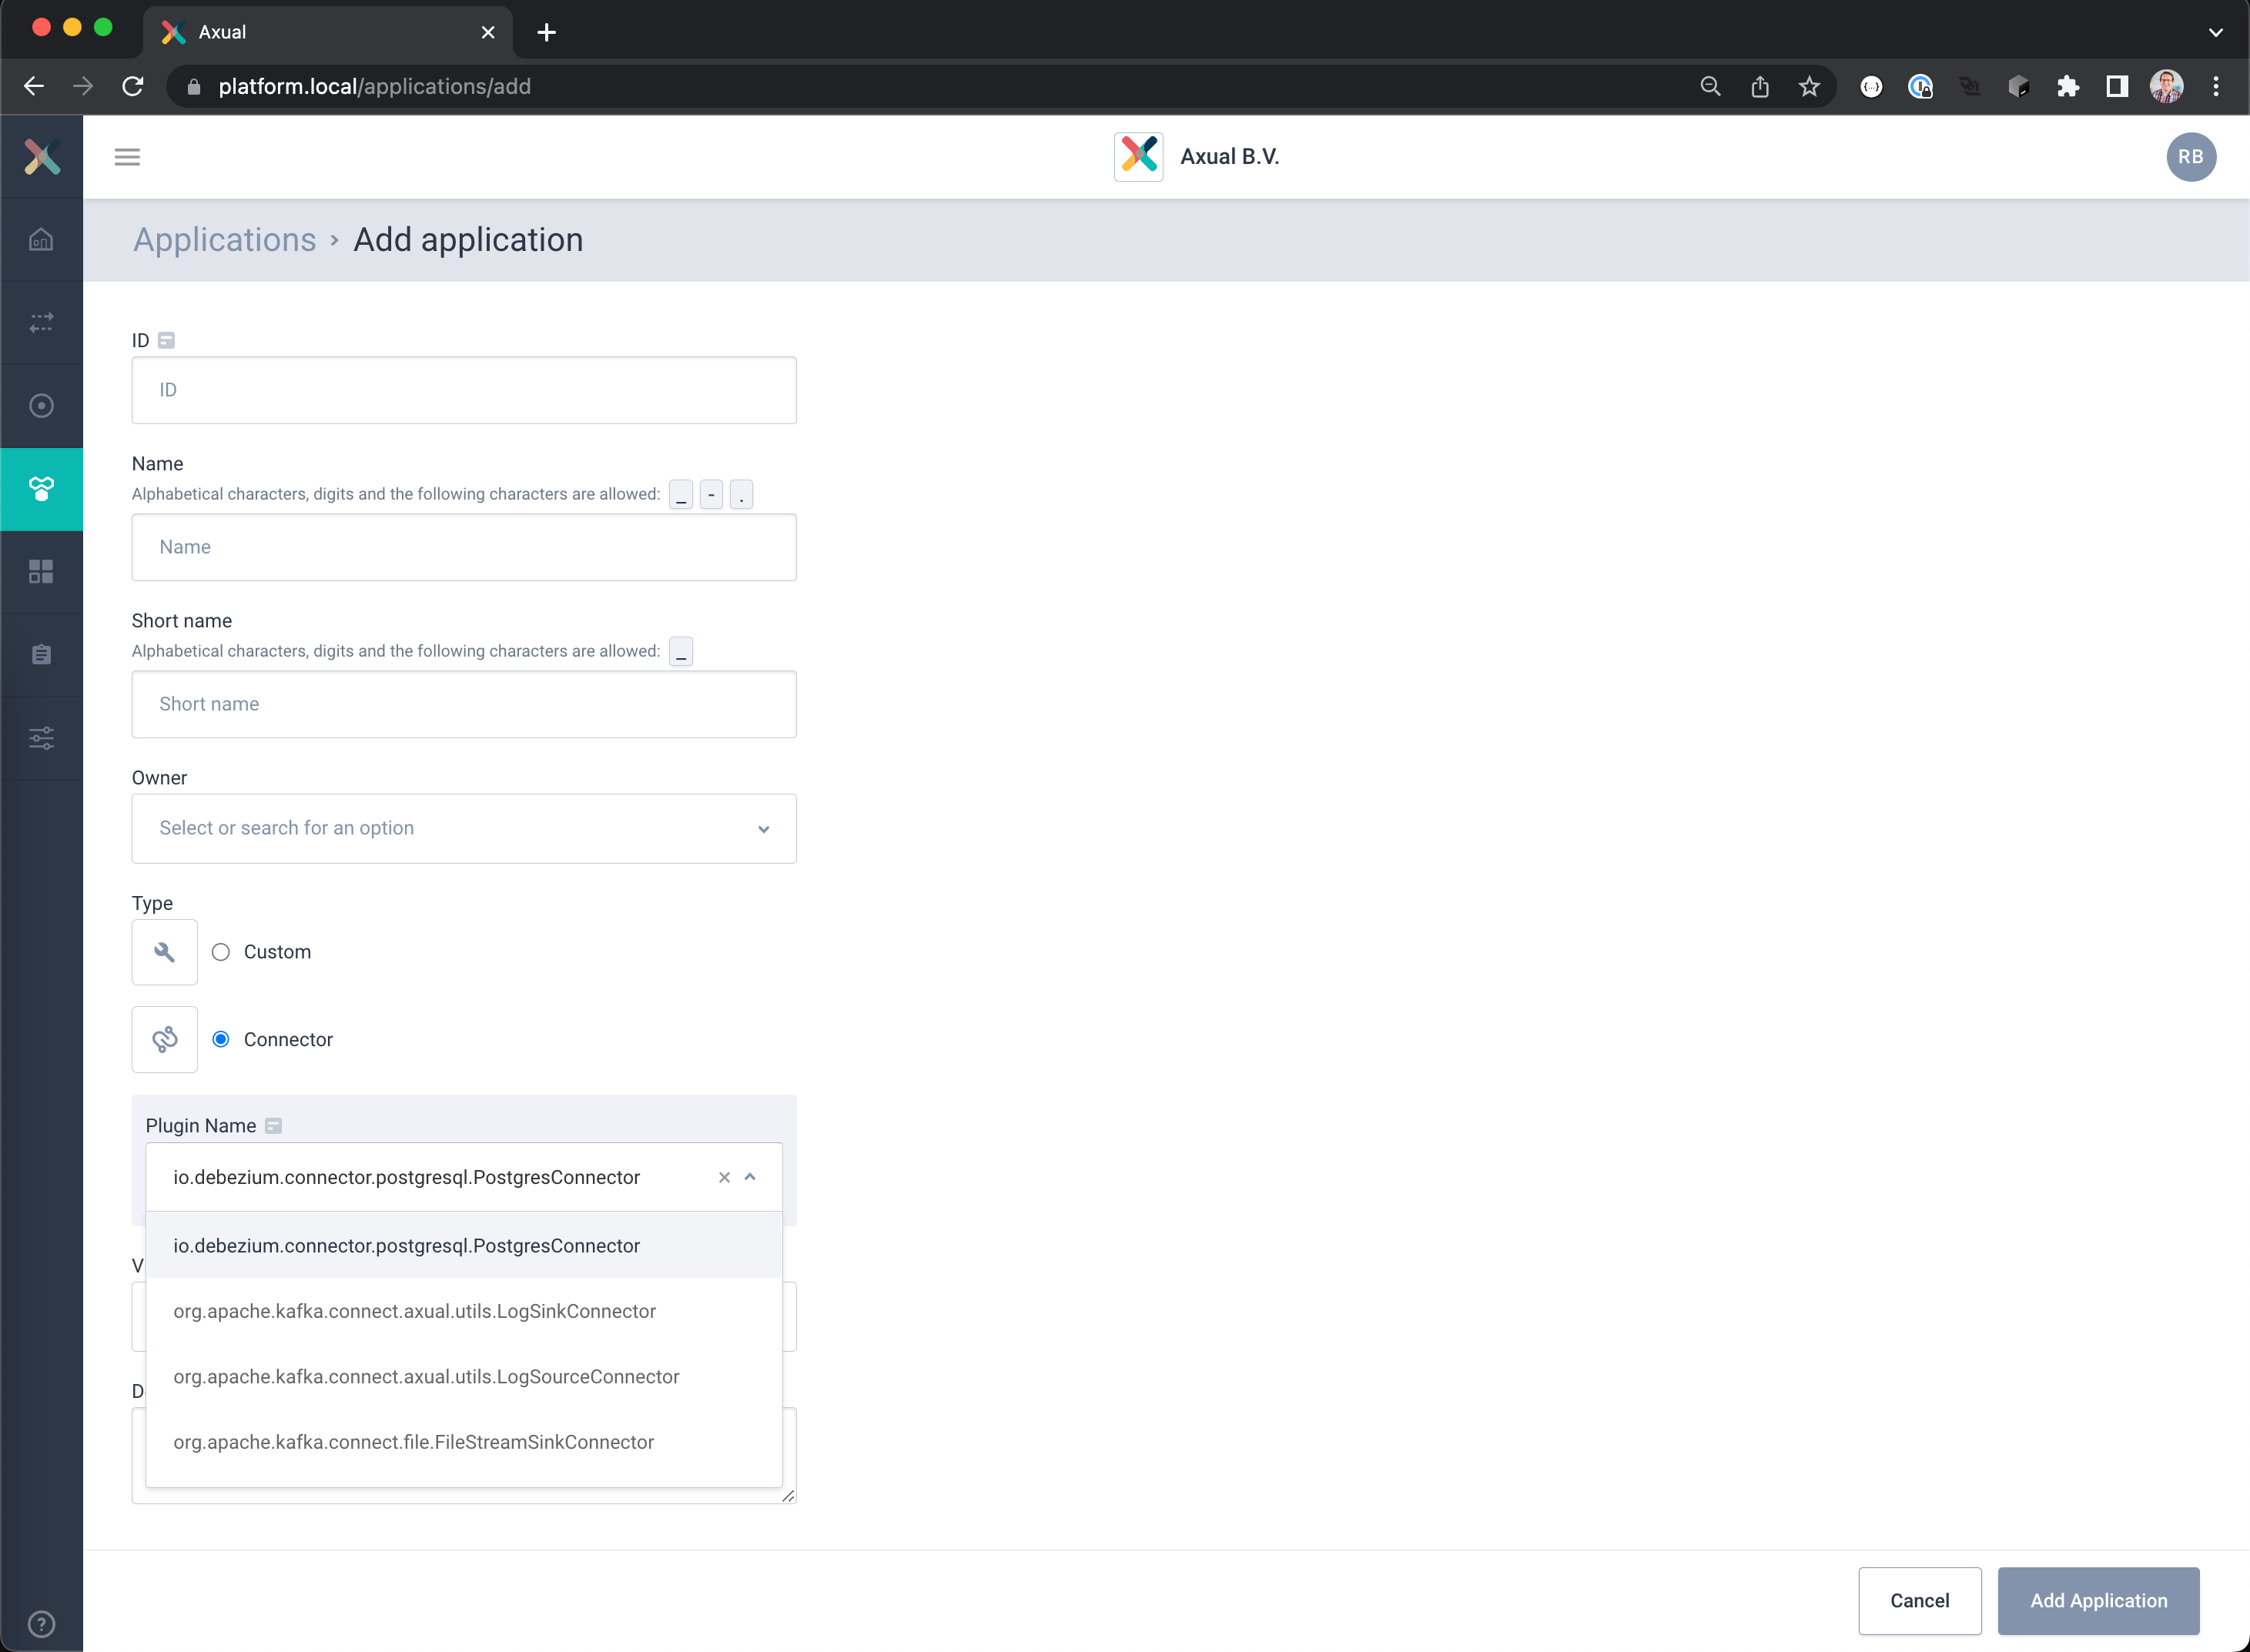
– Select as Type Connector
– Select the Plugin io.debezium.connector.postgresql.PostgresConnector
– Complete the registration with the following settings:
ID: cdc.incident.reports
Name: CDC Incident Report Capture
Short name: cdc-incident-reports
Owner: <Your team> (Incident Management in example)
Visibility: Public
Description: Captures database changes from the incident reports table
– Click the button Add Application to save your settings
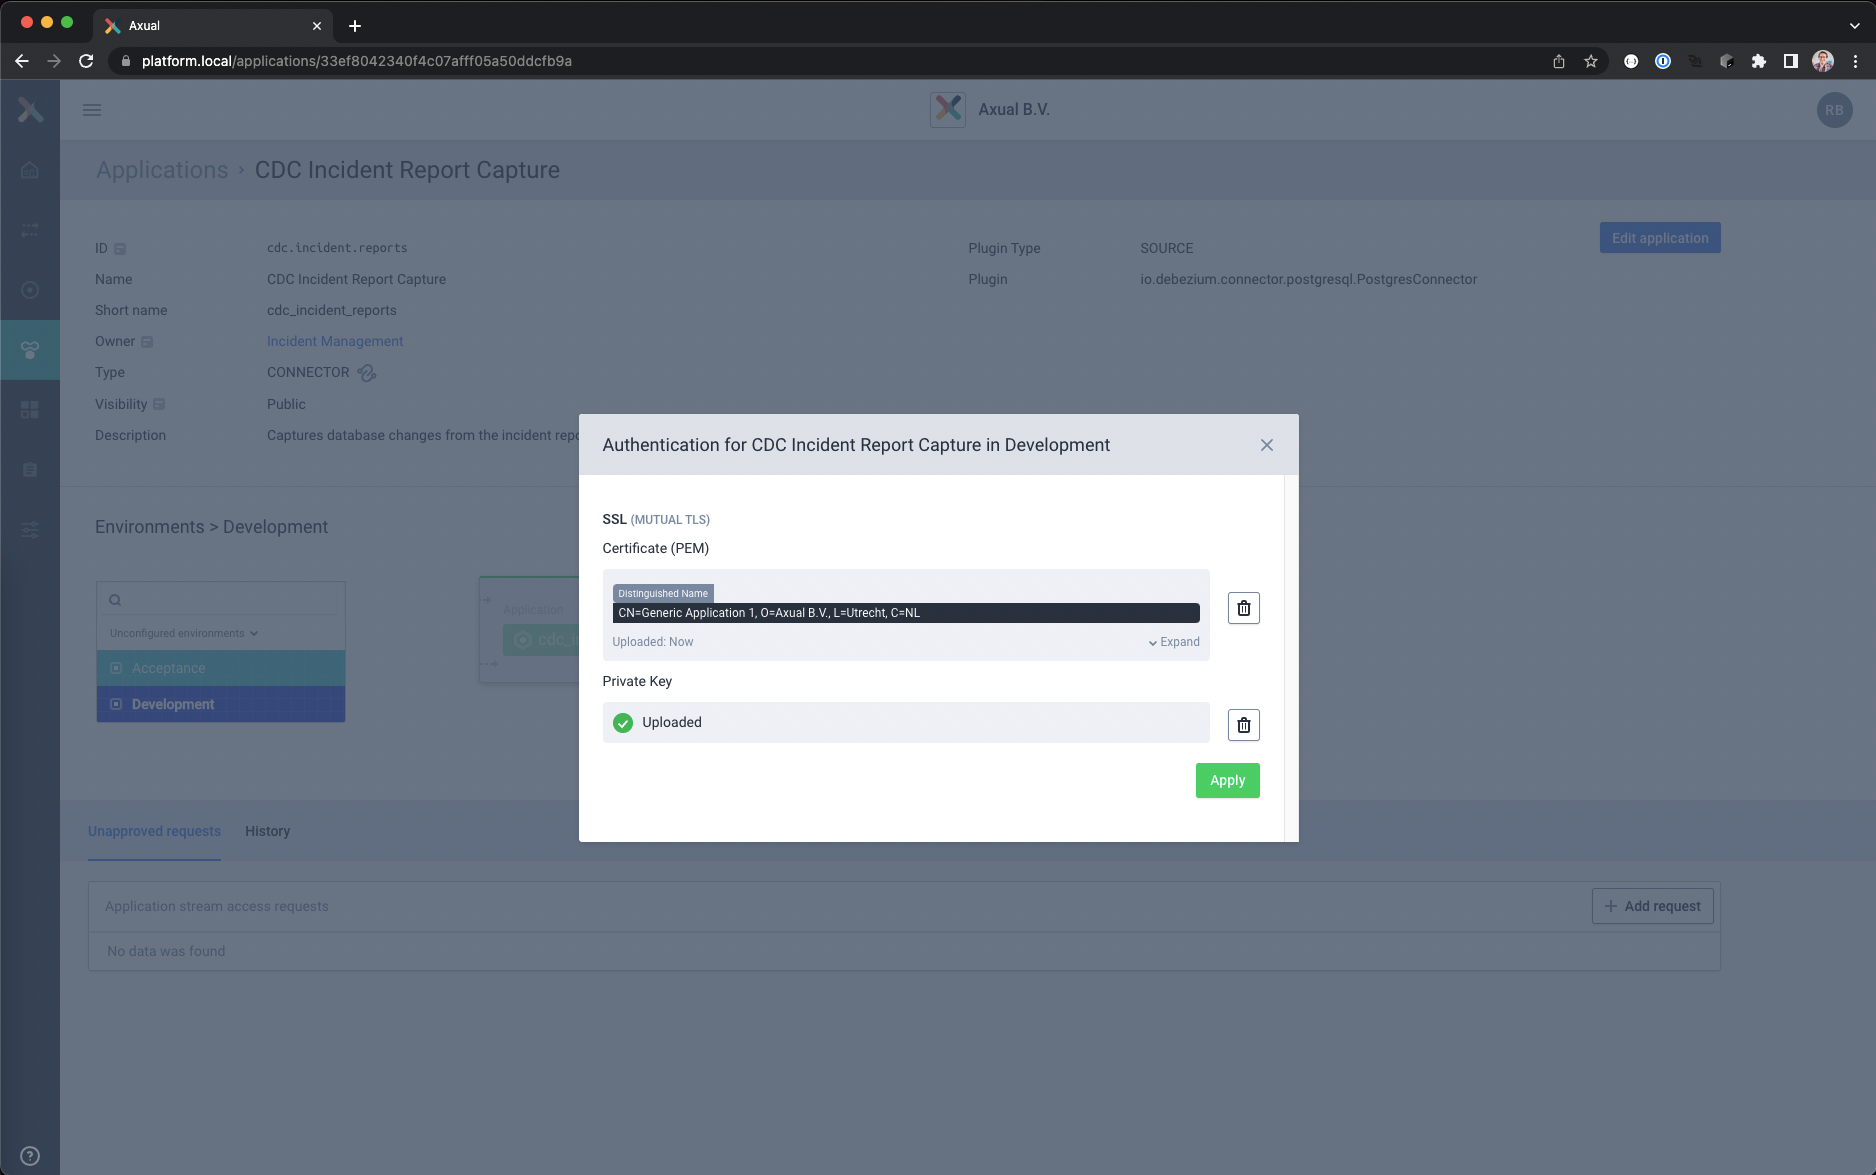
- Select Development environment and click on the lock icon to load the authentication data
– Upload the file containing the client certificate chain.
– Upload the unencrypted private key in PKCS8 format, this will be securely stored and used by the connector for authentication.
– Save and close the authentication window
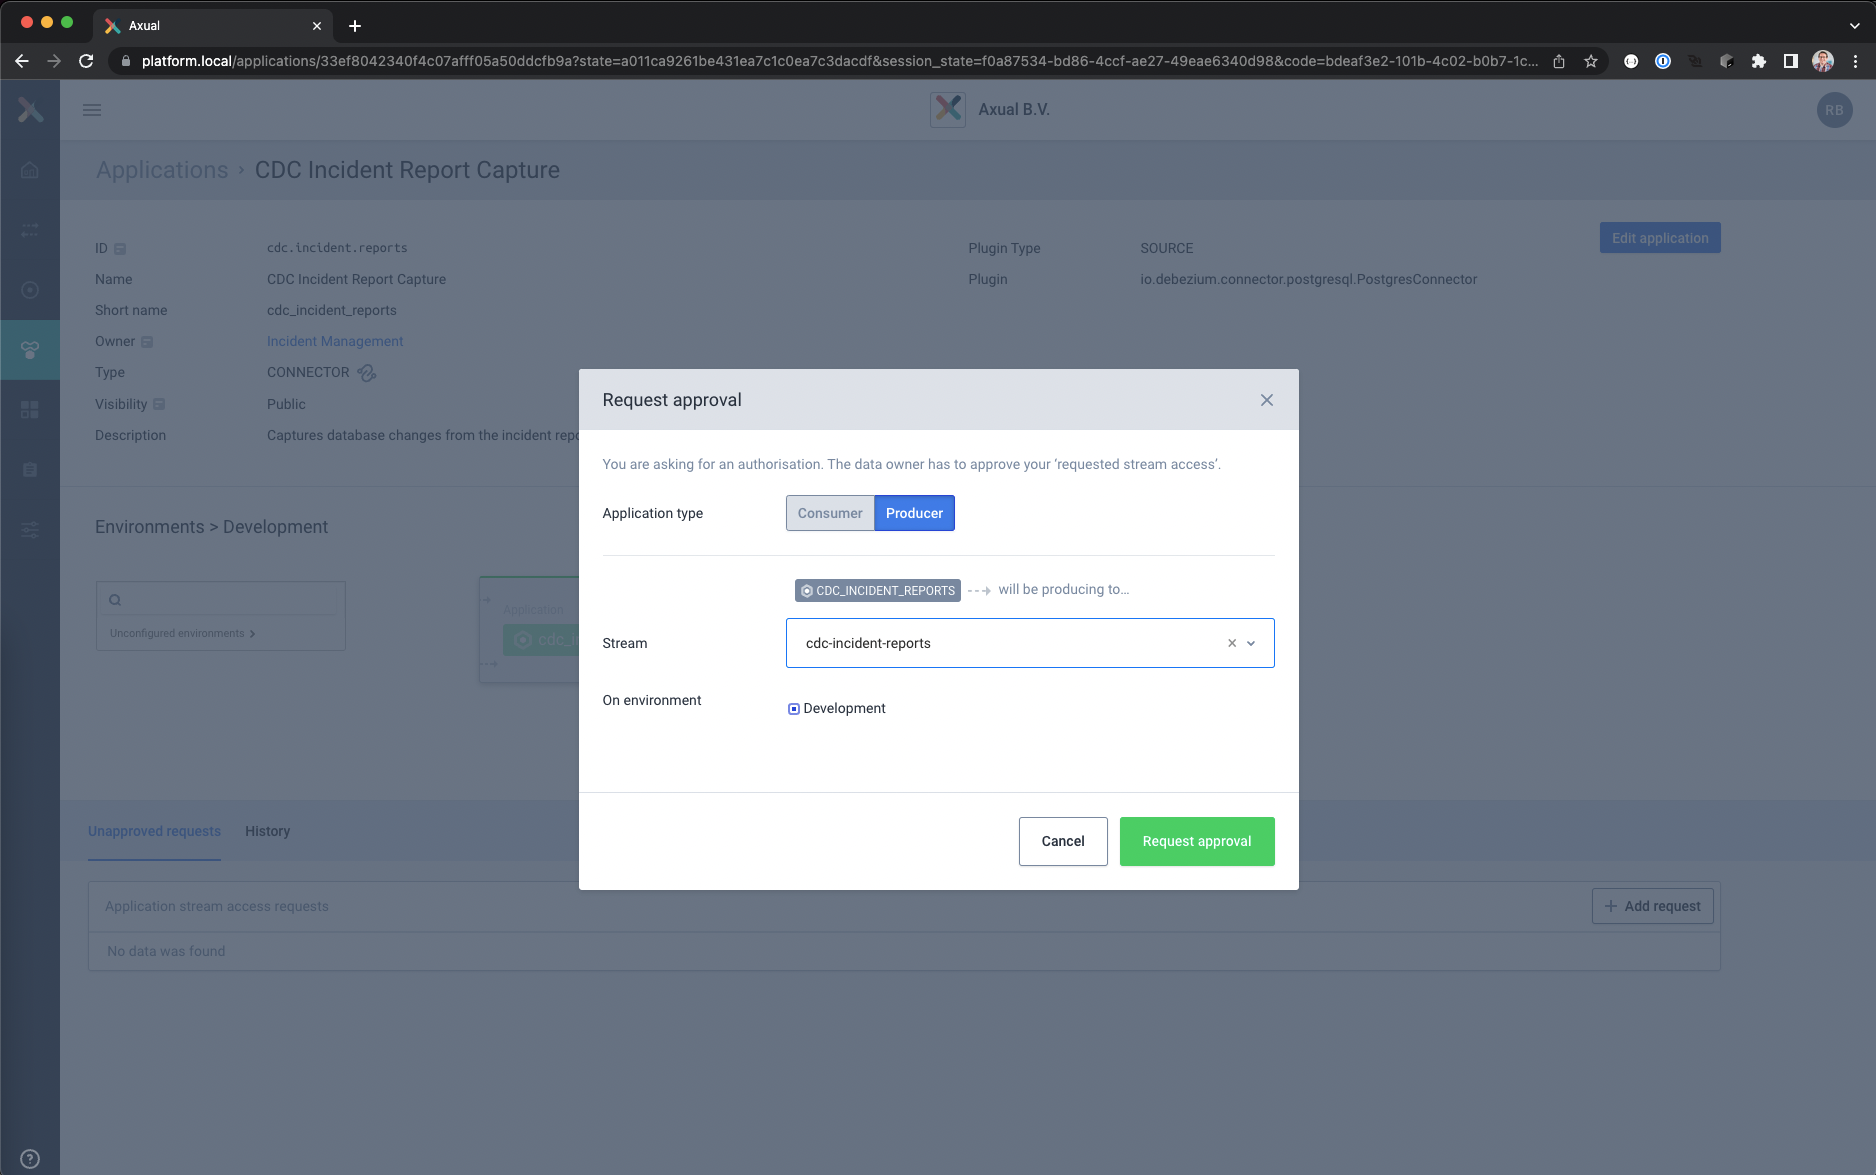
- Click Add Request to request Produce access to stream cdc-incident-reports
– Use the following values
Application type: Producer
Stream: cdc-incident-reports
Environment: Development
– Click Request Approval
- Click Add Request to request Produce access to stream cdc-incident-transactions
– Use the following values
Application type: Producer
Stream: cdc-incident-transactions
Environment: Development
– Click Request Approval - Open the configuration window by clicking on the gear icon.
- Enter the required configuration properties in the new view.
The properties in this blog are split into several tables, each controlling a subsection of the connector.
The UI will provide the configuration options ordered alphabetically.
Database Connectivity Settingsdatabase.dbname =<database name>
databasse.hostname =<hostname where to reach the database>
database.port =<port number where database is listening>
database.server.name =incidentdb
database.user =cdcUser
database.password =cdcDemo
Target Schema and Table Settingsschema.include.list =INCIDENTS
Replication and Processing Settingsplugin.name =pgoutput
publication.autocreate.mode =filtered
publication.name =incidents_publication
slot.name =incidents_slot
snapshot.mode =initial
tombstones.on.delete =false
transaction.topic =cdc-incident-transactions
Kafka Connect Task,
Converters and Transformation Settingsheader.converter =org.apache.kafka.connect.storage.SimpleHeaderConverter
key.converter =org.apache.kafka.connect.json.JsonConverter
value.converter =org.apache.kafka.connect.json.JsonConverter
tasks.max =1
transforms =Routing
transforms.Routing.type =io.debezium.transforms.ByLogicalTableRouter
transforms.Routing.topic.regex =.*
transforms.Routing.topic.replacement =cdc-incident-reports
❗The Transformation properties are custom properties and can be added with the Add Property button.
Enter the configuration key and value and press the Plus sign next to the value field to save that property
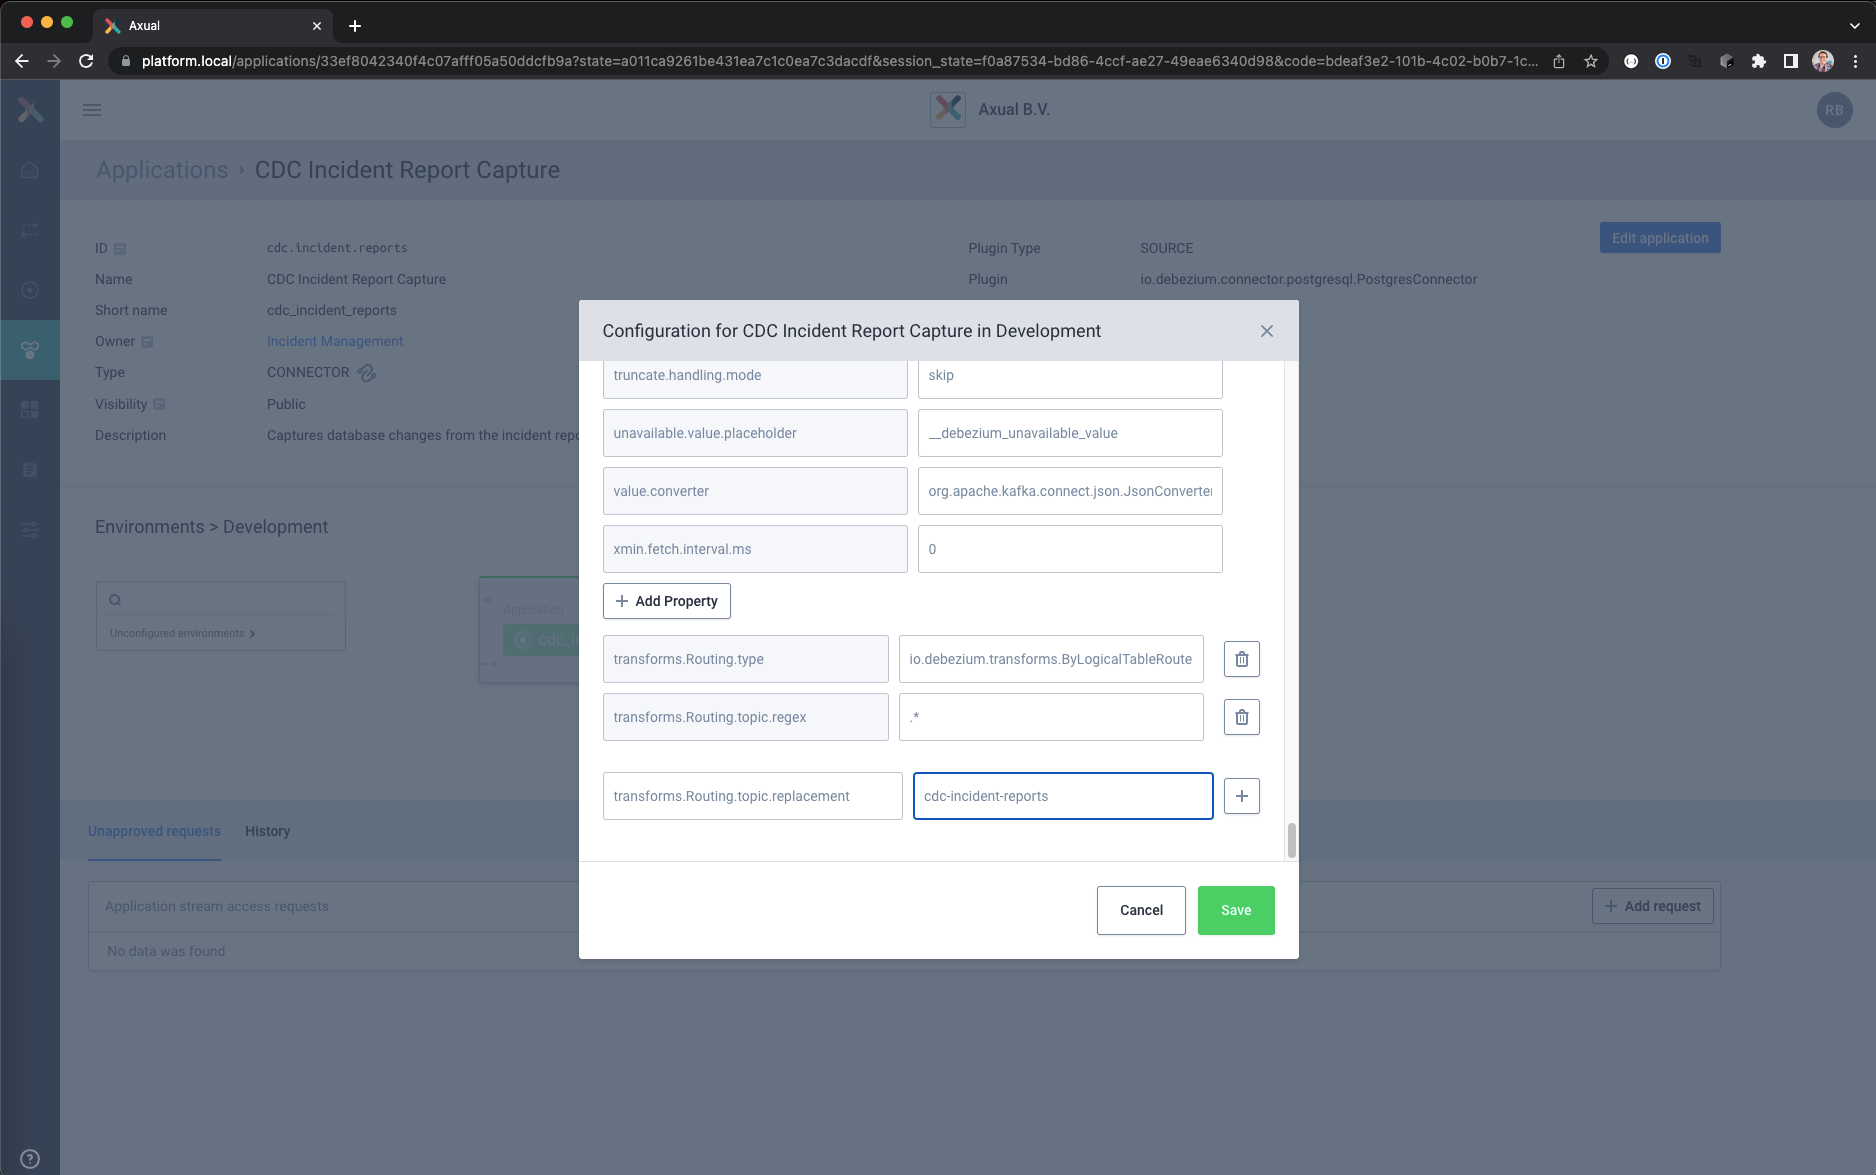
- When all the configuration is entered, press the Save button to validate the configuration and save it.
The configuration is now ready to be deployed - Press the Start icon in the Application Detail page
It will take a couple of seconds to configure and start the connector on the Connect cluster.
When the Start icon changes in a Stop/Pause icon without and no error is shown the connector will be started
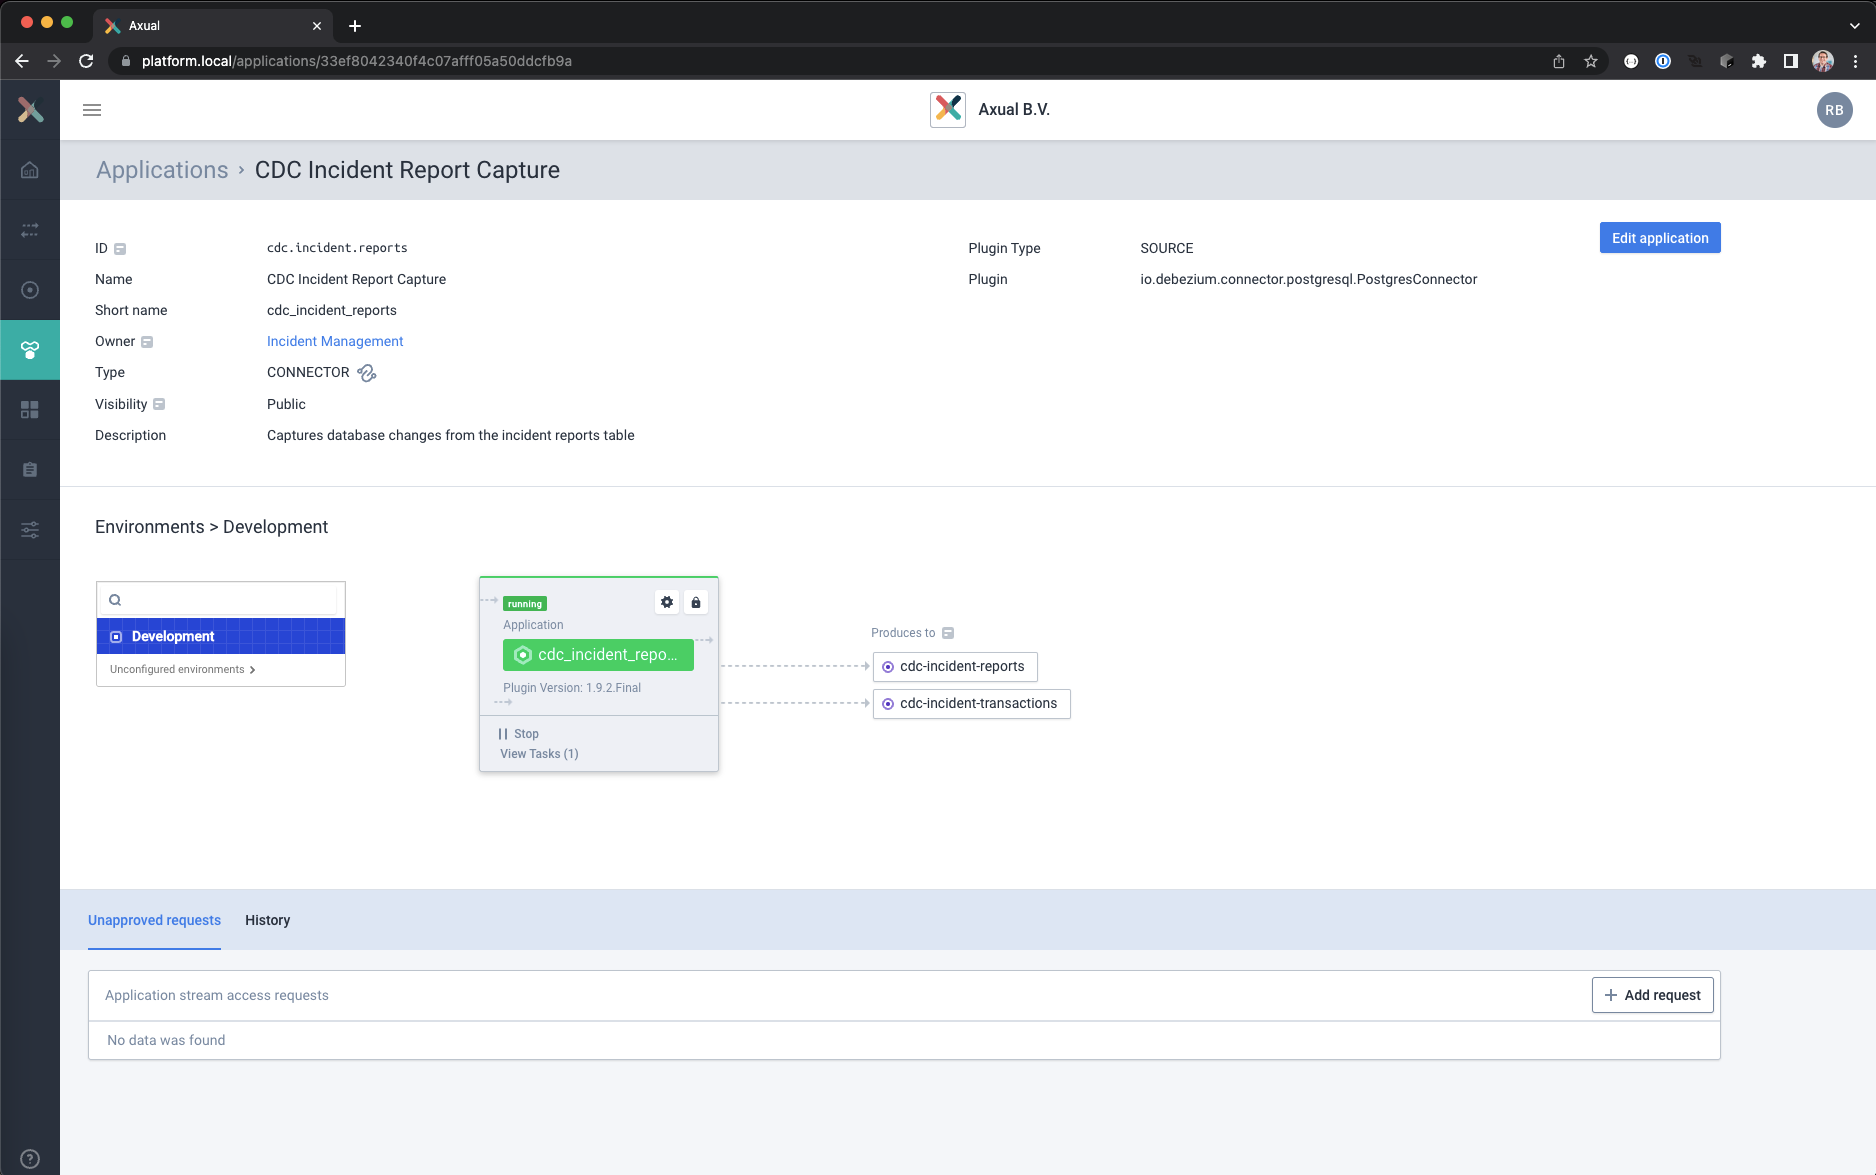
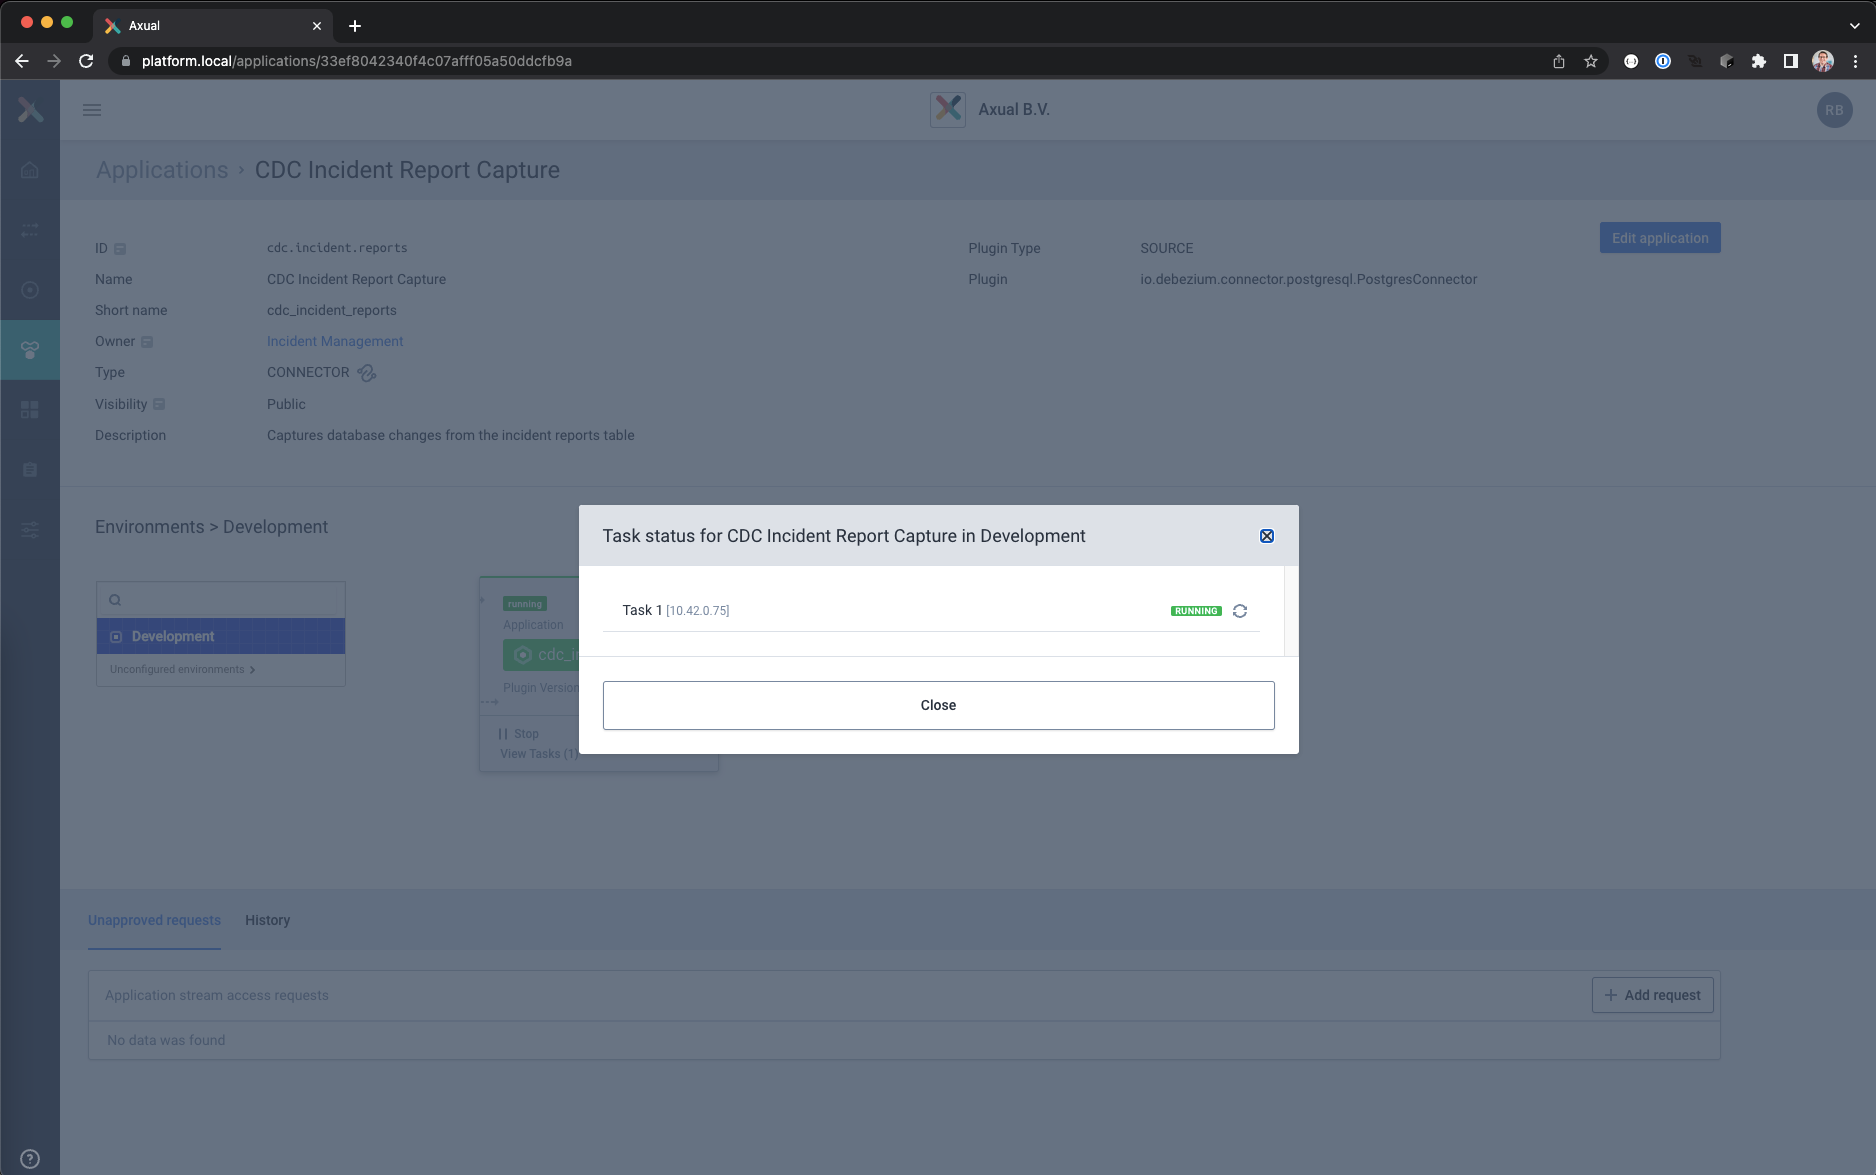
- Click on View Tasks to see where the task is running.
If a task fails you can see the reason here, including a restart task button
Viewing the Debezium generated events for the initial data
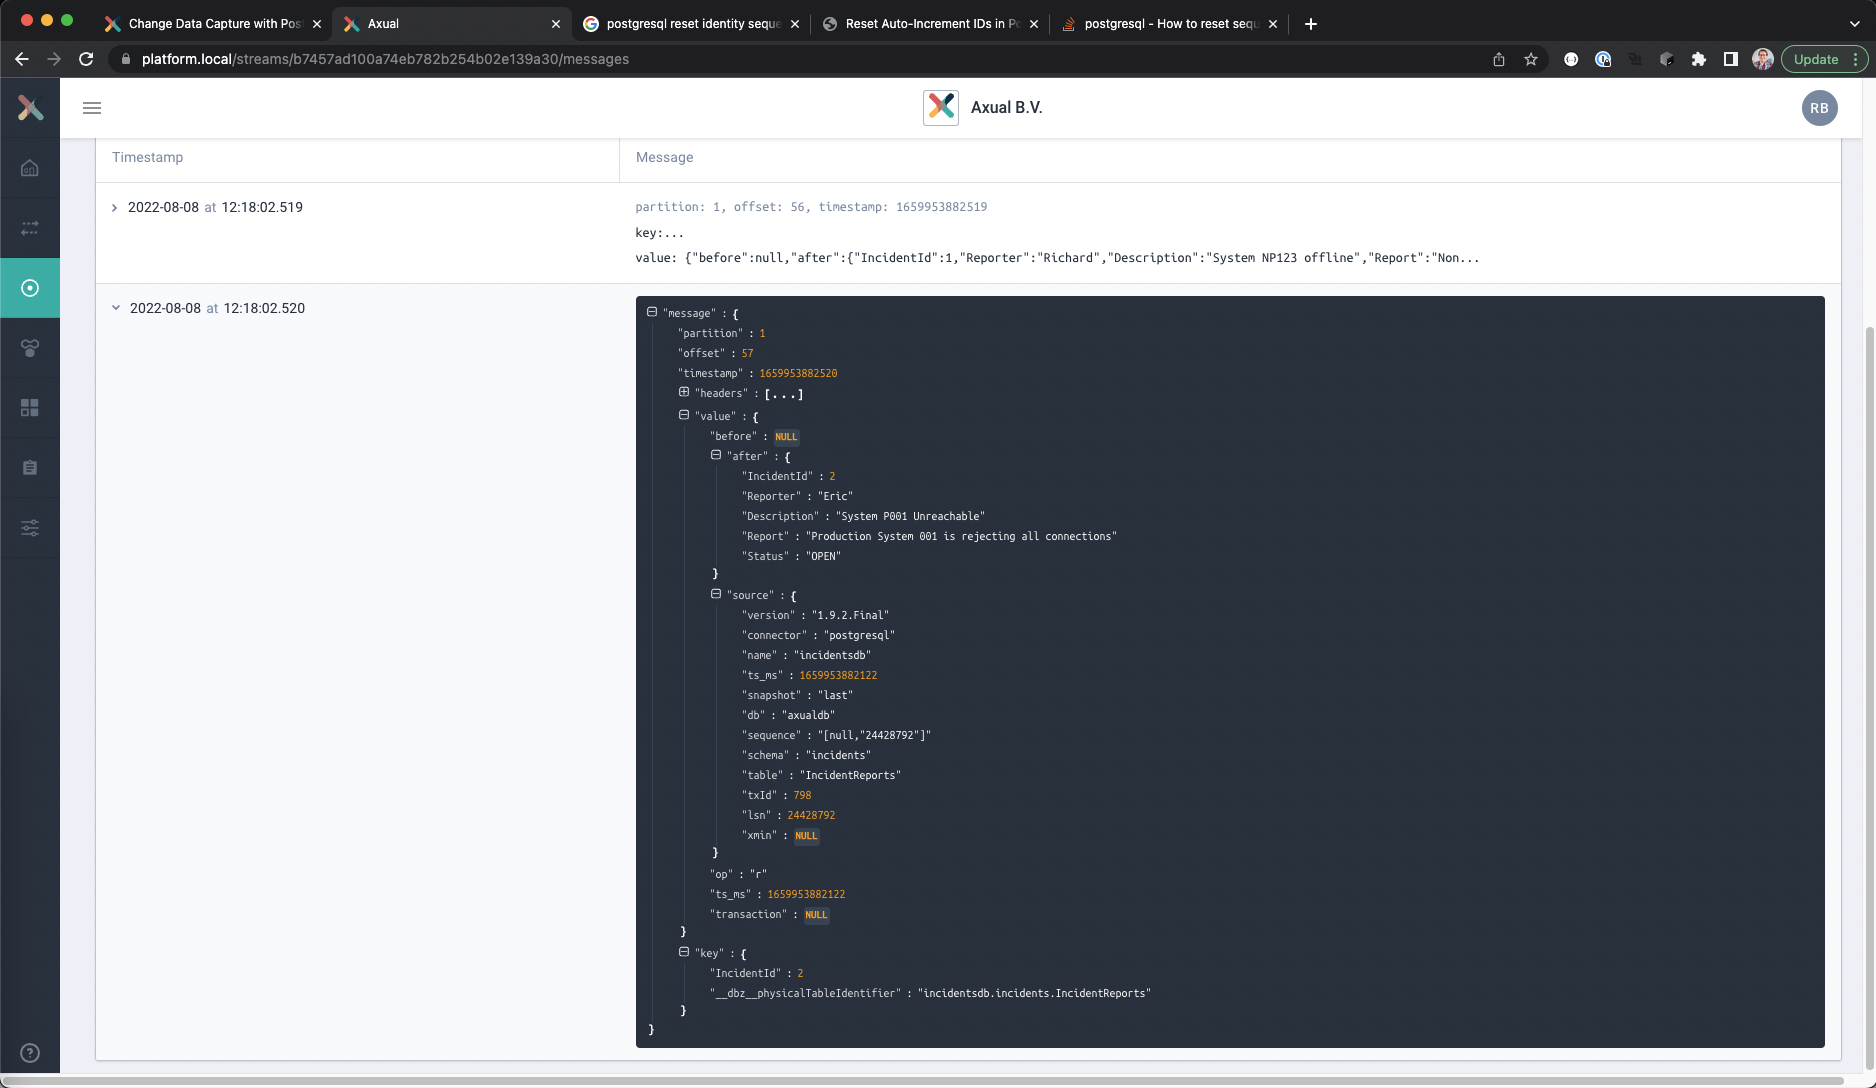
The Debezium connector has created the initial records on the topic for data that is already in the database.
The new Kafka records can be shown with Axual Self Service
- Log into the Self Service portal with your user account
- Go to the Streams page
- Select the cdc-incident-reports stream
- Click on Browse & Search in the top right corner.
The Browse & Search view will open - Select the environment and time window you want to search in, leave the keyword field empty and click the Search button.
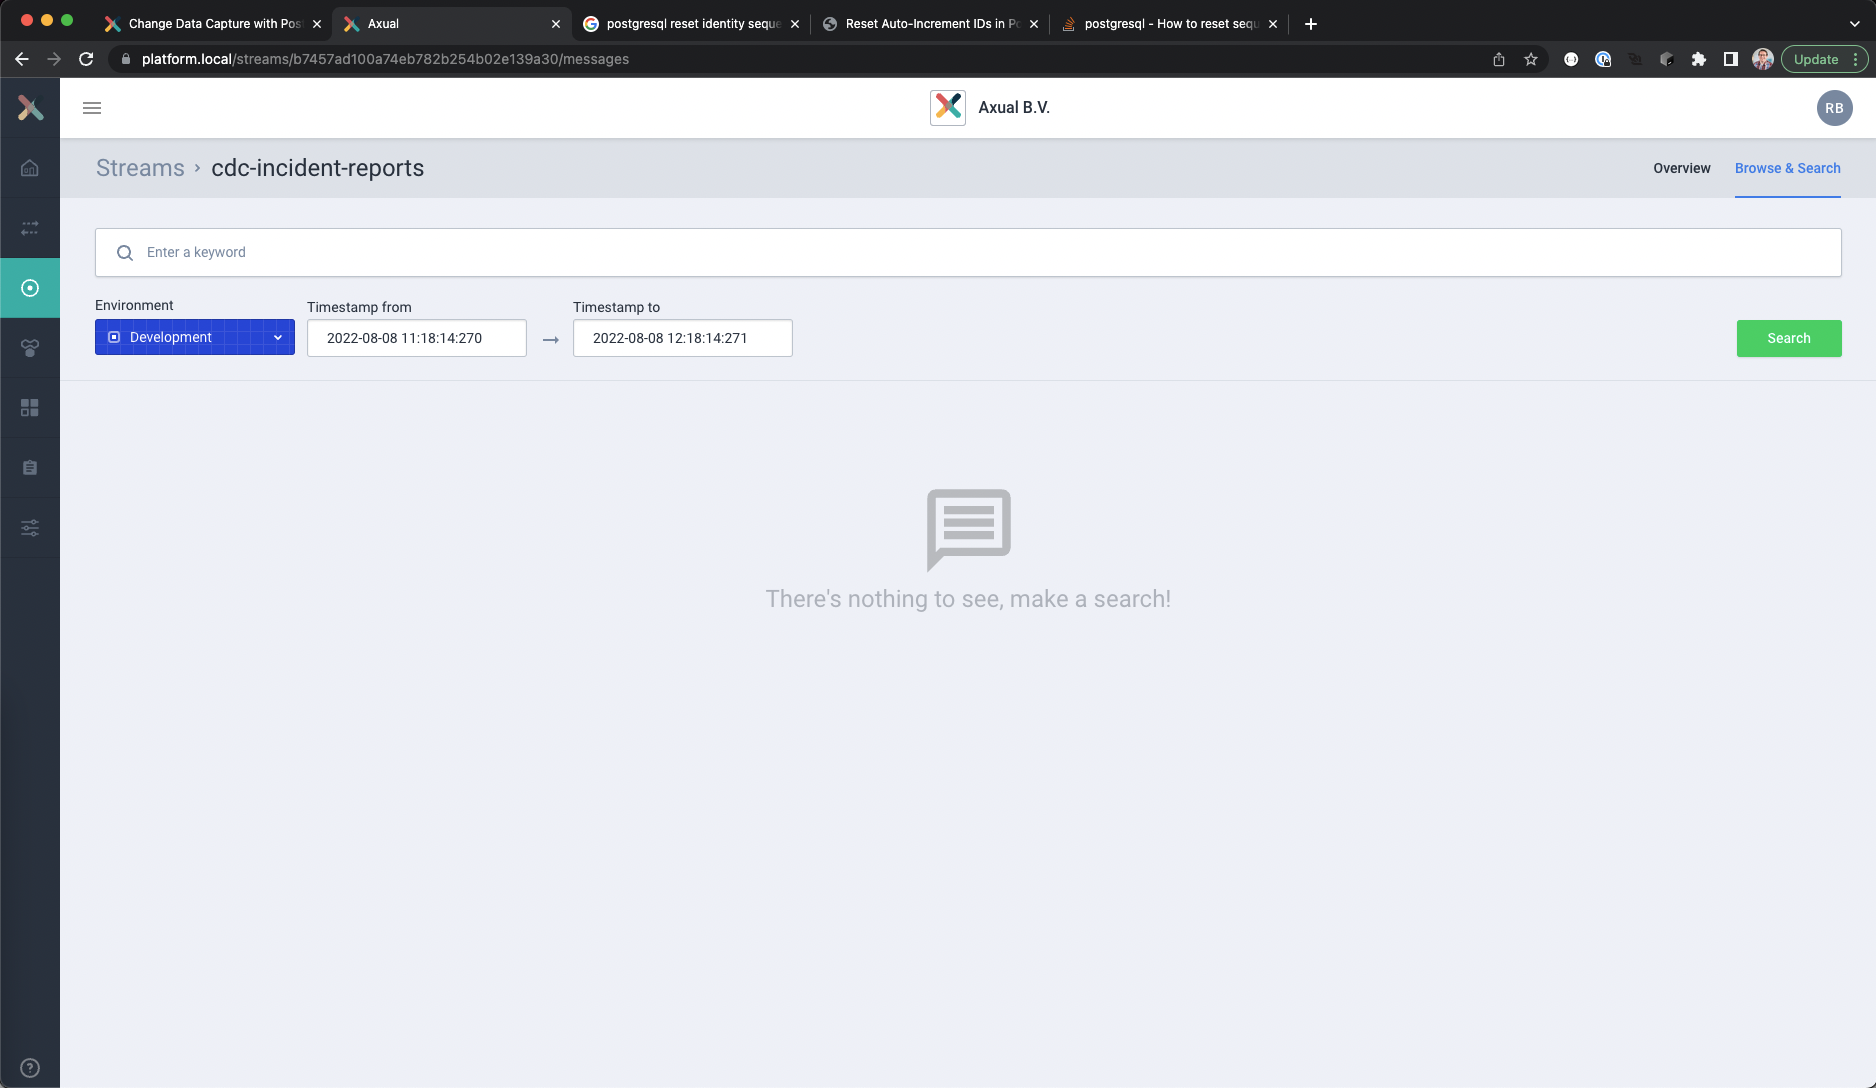
- Open the details of a record by clicking on the timestamp.
The message content is normally collapsed, but if you open the value and key fields it should look like this
Changing the contents of the database table
The IncidentReports table is filled with some from a previous step.
In this step new records will be created, and existing records will be altered and deleted in a single transaction. The example code will use the psql client on the database server to insert the data.
- Open the SQL client and connect to the database
psql -U <username> -d <database name> -h <hostname> -p <port number> - A prompt should appear to enter the password.
- Verify the contents of the table.
SELECT * FROM INCIDENTS."IncidentReports";
It should look similar to this.
 IncidentId | Reporter |       Description       |                      Report                        | Status
------------+----------+-------------------------+----------------------------------------------------+--------
      1     | Richard  | System NP123 offline    | Non Production System 123 is offline               | OPEN
      2     | Eric     | System P001 Unreachable | Production System 001 is rejecting all connections | OPEN
(2 rows)
- Use the following SQL statements to change the records in the IncidentReports table.
All changes will be made in a single transaction to demonstrate how transactional changes are captured
START TRANSACTION;
INSERT INTO INCIDENTS."IncidentReports"( "Reporter", "Description", "Report" )
VALUES ('Ruth', 'Switch SW-P-12 rejects connections', 'The switch SW-P-12 is rejecting all connections' );
UPDATE INCIDENTS."IncidentReports"
SET "Status" = 'CLOSED' WHERE "Reporter" = 'Eric';
DELETE FROM INCIDENTS."IncidentReports"
WHERE "Reporter" = 'Richard';
COMMIT;
- Verify the contents of the table.
SELECT * FROM INCIDENTS."IncidentReports";
It should look similar to this.
 IncidentId | Reporter |            Description             |                      Report                        | Status
------------+----------+------------------------------------+----------------------------------------------------+--------
      5     | Ruth     | Switch SW-P-12 rejects connections | The switch SW-P-12 is rejecting all connections    | OPEN
      2     | Eric     | System P001 Unreachable            | Production System 001 is rejecting all connections | CLOSED
(2 rows)
- Disconnect from the database and close the SQL Client
Viewing the Debezium generated events for the changed data
The changes made in the previous steps have been captured by the Debezium connector as well, and can be viewed using Self Service.
The data format of the changes will be explained separately in a separate section.
Viewing the captured incident reports
- In Self Service, go to the Browse & Search view for the cdc-incidents-reports stream
- Search for the last hour.
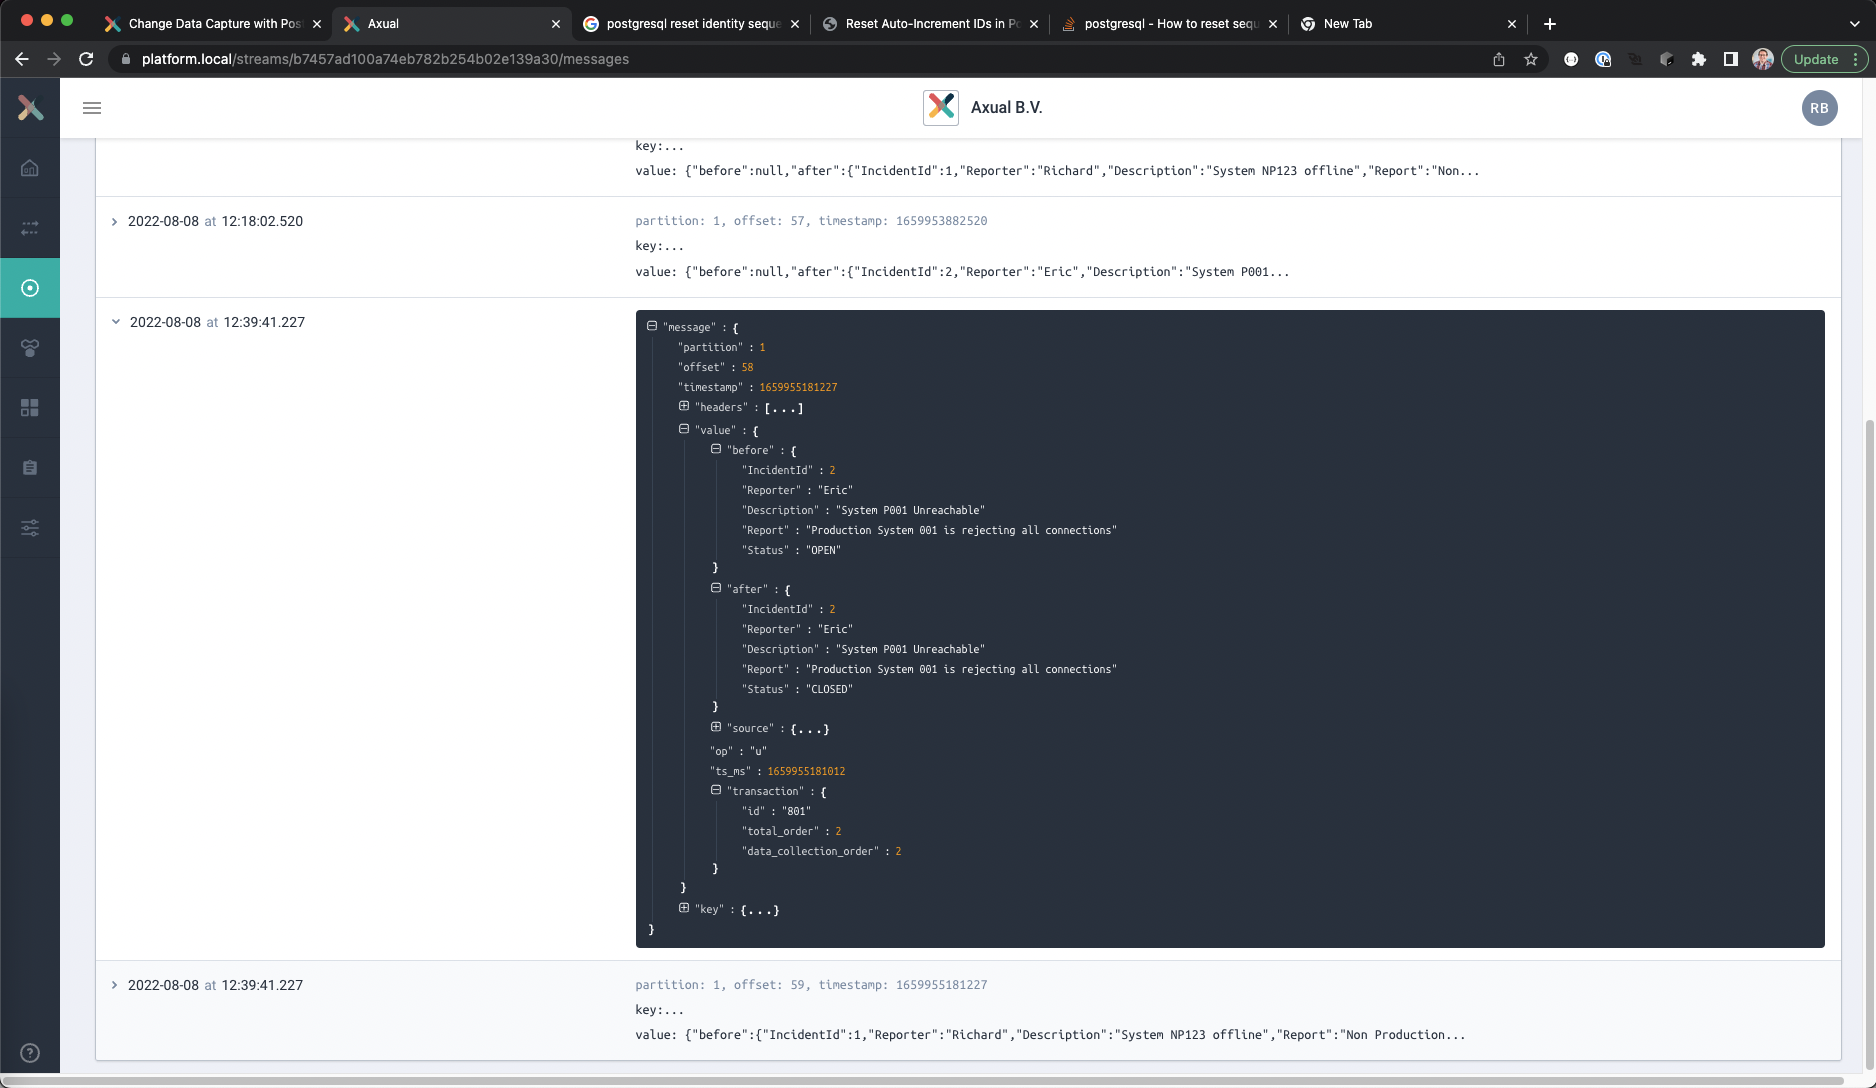
Three new records should be visible, an insert record for Ruth, the change for Eric and the deletion of Richard’s report. - Open the content of any of the messages, and expand the field “value” to see the actual change
- Expand the field “transaction”
This will show which transaction the change was a part of.
Viewing the captured transactions
- In Self Service, go to the Browse & Search view for the cdc-incident-transactions stream
- Search for the last hour.
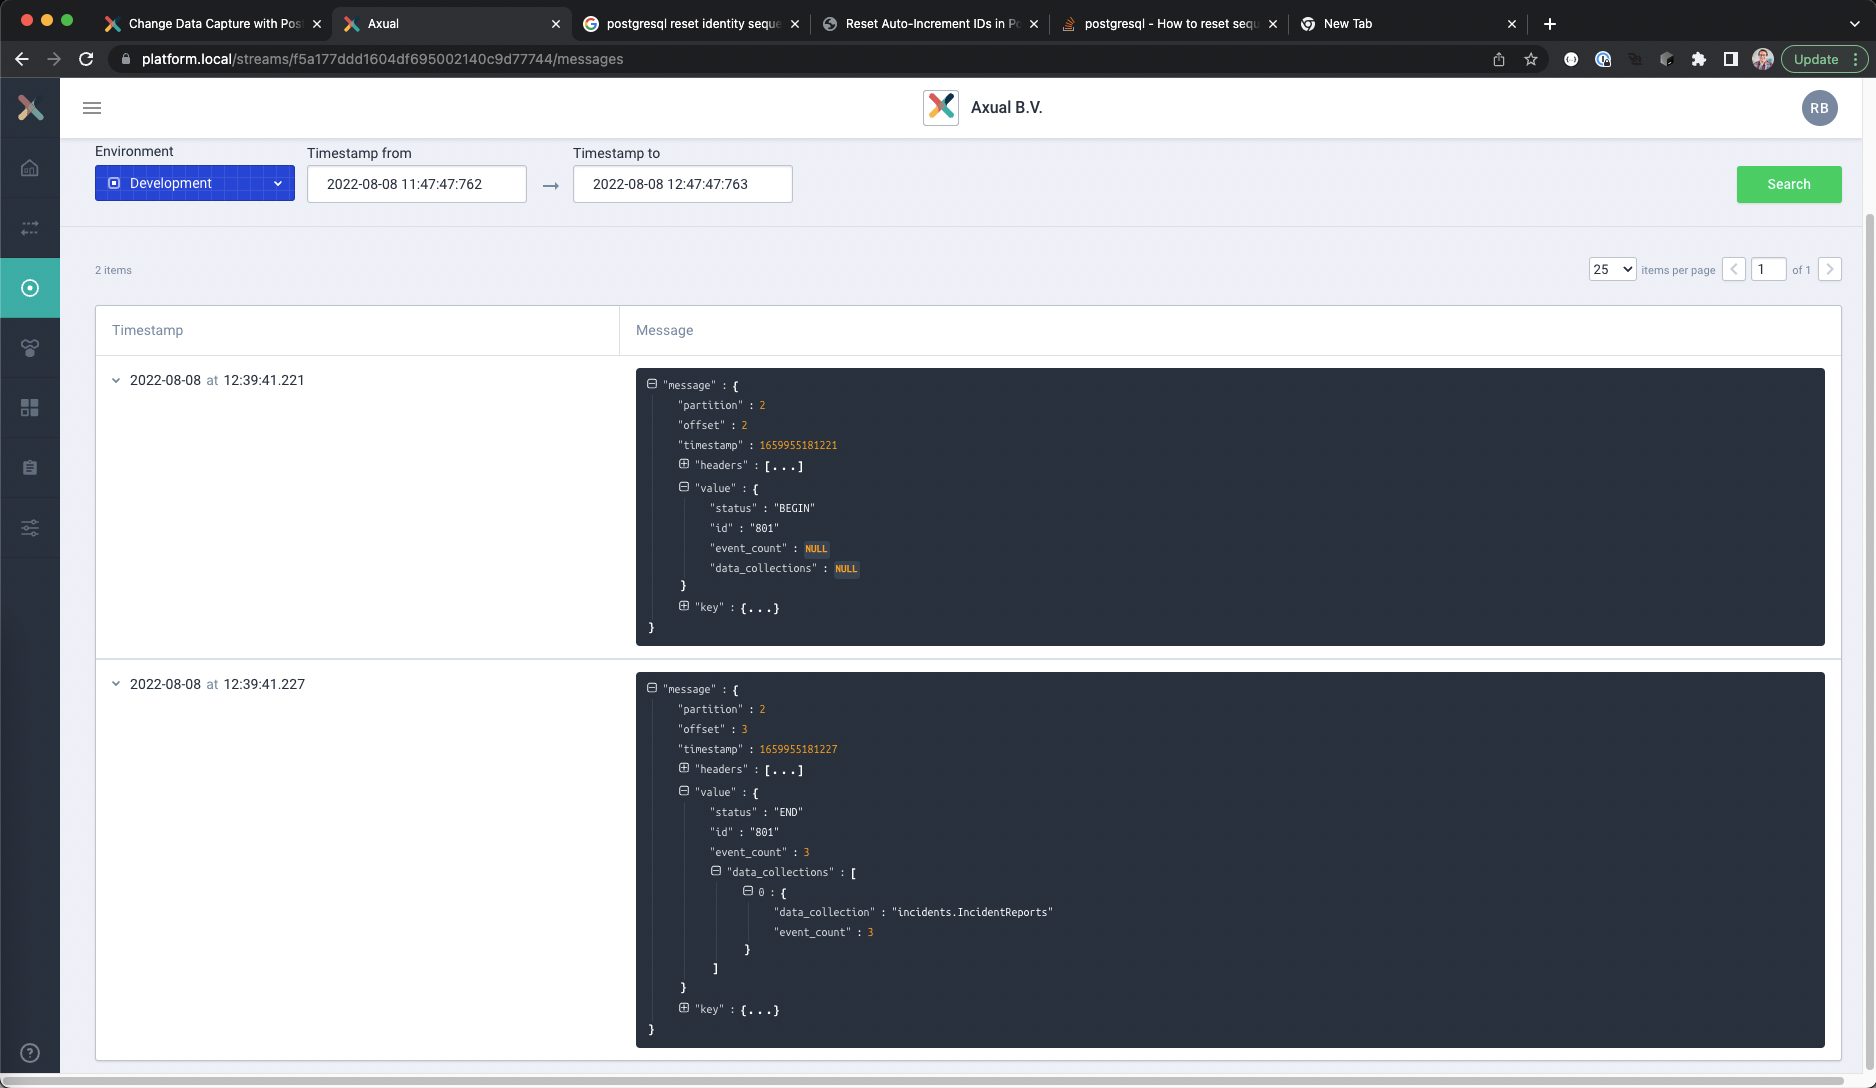
- Two new records should be visible, one for starting and one for ending a transaction.
- Open the content of any of the messages, and expand the field “value” to see the transaction data
The END transaction change also contains a count of the number of events where part of the transaction.
In this example it should be three, because the INSERT, UPDATE and DELETE statements were part of the same transaction.
Debezium Data Formats
The two main Debezium formats are for the Data Change Event and the Transaction Event.
Data Change Event Key
{
  "IncidentId" : 2,
  "__dbz__physicalTableIdentifier": "incidentsdb.incidents.IncidentReports"
}
The key of a record consists of the primary key fields of the captured table containing the relevant values plus a special field:
- __dbz__physicalTableIdentifier, which provides a fully resolved table name using the format <database.server.name>.<schema name>.<table name>
This will always provide a unique record for a record in the database, and allows tombstone records to be set for Kafka compaction topics.
Data Change Event Value
{
  "before" : {
    "IncidentId" : 2,
    "Reporter" : "Eric",
    "Description": "System P001 Unreachable",
    "Report" : "Production System 001 is rejecting all connections",
    "Status" : "OPEN"
  },
  "after" : {
    "IncidentId" : 2,
    "Reporter" : "Eric",
    "Description": "System P001 Unreachable",
    "Report" : "Production System 001 is rejecting all connections",
    "Status" : "CLOSED"
  },
  "source":{
    "version" : "1.9.2.Final",
    "connector" : "postgresql",
    "name" : "incidentsdb",
    "ts_ms" : 1659955180497,
    "snapshot" : "false",
    "db" : "axualdb",
    "sequence" : "[null,"24455872"]",
    "schema" : "incidents",
    "table" : "IncidentReports",
    "txId" : 801,
    "lsn" : 24455872,
    "xmin" : null,
  },
  "op" : "u",
  "ts_ms" : 1659955181012,
  "transaction":{
    "id" : "801",
    "total_order" : 2,
    "data_collection_order" : 2
  }
}
The value of a record has the following fields:
- source
The source information field, containing connector information.
– version
The Debezium connector version used to capture the data
– connector
The type of connector used, in this case postgresql
– db
The database name
– name
The logical name for the database as specified by the connector config
– schema
The schema name where the data change was captured
– table
The table name where the data change was captured
– ts_ms
The time the change was made in the database
– txId
The transaction ID where the change was made
– lsn
The log sequence number - before
This contains the record data as it was before the change, with each column of the table represented as a field in the object.
The field is NULL if it is the record was inserted - after
This contains the record data as it was before the change, with each column of the table represented as a field in the object.|
The field is NULL if the record is deleted - op
The performed CRUD operation that captured it
“c” for newly created/inserted records
“r” for read (usually as part of creating a snapshot)
“u” for updated records
“d” for deleted records - ts_ms
The timestamp that the change was captured. - transaction
The transaction object related to the change
– id
The unique transaction ID of the change
– total_order
The absolute position of the event among all events generated by the transaction
– data_collection_order
The absolute position of the event among all events generated by the transaction for the specific table
Transaction Event Key
{
  "id": "801"
}
The key of a transaction record consists of just one field named “id”, the transaction identifier as string
Transaction Event Value
{
  "status" : "END",
  "id" : "801",
  "event_count" : 3,
  "data_collections" :[
    {
      "data_collection" : "incidents.IncidentReports",
      "event_count" : 3
    }
  ]
}
The value of a transaction record has the following fields:
- status
Wether it’s a start or end of transaction event - id
The transaction identifier - event_count
The total number of events that are part of the transaction - data_collection
An array of named collections that are changed in the transaction.
Each entry has the following fields
– data_collection
The name of the table that was changed
– event_count
The number of changes made to the table in the transaction
Final note
This blog is meant as a starting point for working with Debezium and PostgreSQL.
Both Debezium and PostgreSQL offer more advanced settings to capture changes made to a database, and their websites contain a lot of documentation on how to do this.
Are you excited about Axual and would you like to try our product yourself? You can start a free trial here.
Useful links
- Axual Self Service documentation
https://docs.axual.io/axual/2022.2/self-service/index.html - Axual free 30-day trial
https://axual.com/trial/ - Debezium for PostgreSQL documentation
https://debezium.io/documentation/reference/1.9/connectors/postgresql.html - Debezium Transformations documentation
https://debezium.io/documentation/reference/1.9/transformations/index.html - PostgreSQL documentation
https://www.postgresql.org/docs/14/index.html
Answers to your questions about Axual’s All-in-one Kafka Platform
Are you curious about our All-in-one Kafka platform? Dive into our FAQs
for all the details you need, and find the answers to your burning questions.
Change Data Capture (CDC) is a pattern that identifies and captures changes made to data in a database. This process allows organizations to send updates, deletions, and insertions to other systems in real-time, ensuring that data remains consistent and up-to-date across different applications. CDC is important for maintaining data integrity, enabling real-time analytics, and facilitating event-driven architectures.
Debezium acts as a CDC tool that connects to PostgreSQL databases, capturing changes made to the data and publishing them as events on the Axual platform. By leveraging Debezium’s Kafka Connect source connector, organizations can efficiently monitor and process changes in PostgreSQL, allowing for real-time updates and integration with other systems.
The Axual Self-Service portal simplifies the configuration of the Debezium PostgreSQL connector, allowing teams to quickly set up and manage their CDC processes without extensive technical expertise. The portal enhances user experience by providing a streamlined interface for deploying Kafka connectors, monitoring performance, and ensuring data governance, making it easier for teams to adopt event-driven architectures and manage their data flows.
Related blogs
Axual 2025.4, the Winter Release, expands on the governance and self-service foundations of 2025.3 with improved KSML monitoring and state management, an enhanced Schema Catalog, and usability improvements across Self-Service and the platform.
Axual 2025.3 release introduces KSML 1.1 integration for automated stream processing deployment, group-based resource filtering for multi-team governance, and experimental MCP Server for AI-driven platform operations. Includes JSON schema support, Protobuf processing (beta), and enhanced audit tracking for enterprise Kafka implementations.
The Axual 2025.2 summer release delivers targeted improvements for enterprise-grade Kafka deployments. In this post, we walk through the latest updates—from enhanced audit tracking and OAuth support in the REST Proxy to smarter stream processing controls in KSML. These features are designed to solve the real-world governance, security, and operational challenges enterprises face when scaling Kafka across teams and systems.
